Saturday, December 31, 2011

Mini Brownies


Belated Merry Christmas and a Happy New Year's Eve to everyone! We are in a our new home!!! And we somehow managed to host a 20 person Christmas dinner made up of 5 courses with help of our awesome family!! We owe a lot to all the members of my family who dedicated countless hours to do everything from cook, clean, and unpack to lay flooring and painting. We still haven't fully unpacked and despite the fact that the kitchen floors are still not grouted, it was a perfect Christmas in our new home! However, our house and the internet have yet to be friends so this is my first post in the month of December as ironically the month and year come to a close! Pictures, stories, and of course, more recipes to come in 2012! Wishing many blessings to all of you in this new year!


Since December is National Brownie Month, Nicole, from Seven Ate Nine , chose a brownie challenge for this month's What's Baking. I used the brownie recipe from Baker's chocolate topped with a simple ganache for icing. It was a perfect bite-sized treat!


4 squares unsweetened Chocolate
3/4 cup butter or margarine
2 cups sugar
3 eggs
1 tsp vanilla
1 cup flour
1 cup coarsely chopped pecans
1 cup heavy cream
1 cup chocolate chips or chunks


1. Melt the chocolate squares and butter in medium sized bowl in the microwave for about two minutes or until melted. Stir until thoroughly mixed together. Set aside to cool slightly.

2. Transfer chocolate mixture to a mixing bowl and add in sugar. Beat to incorporate.

3. Add in eggs and vanilla on low. Mix in flour and nuts until well blended. We skipped nuts for those who may be allergic, but it would be good. You could replace nuts with white chocolate or semisweet chunks too.

4. Using a small cookie scoop and a well VERY greased mini muffin pan, scoop small amounts into each cup. Put into a preheated oven of 325 degrees and bake for 12-14 minutes. Do not overbake. Flip them onto baking racks to cool. Make sure you grease those cups well or they will get stuck!

5. While the mini brownies cool, heat one cup of heavy cream on stove top or in a microwave until it reaches a boil, then remove. Pour atop chocolate chunks or chips. I opted for milk chocolate, but any kind will do! Let the hot cream soften the chocolate and then stir.

6. Dip mini brownies into the ganache for a yummy topping or eat them naked if you prefer. I also topped them off with dark chocolate chunks, festive sprinkles, and cinnamon chips. Use whatever you have in the pantry! Enjoy! HAPPY NEW YEAR!


Source: Baker's Unsweetened Chocolate Box or Kraft Recipes

Sunday, November 27, 2011

Yeast Dinner Rolls


Hello all! Sorry I've been rather scattered in my posting, I know you've heard it before, but we are actually moving in this weekend! It's taken us about five months to get everything up and running at our new home! Fixer-upper homes that basically need to be gutted and then rebuilt kinda take some time. Hubby and I had crazy, unrealistic aspirations to be done and moved in months ago, but reality hit us, along with the rest of life's business (work, family, obligations) all mixed in with construction, creating a full few months! But the end is near. I just finished painting my new kitchen (AHH! so excited)! For those interested, it's a very soft yellow entitled Popcorn Ball. It seemed fitting. We have so much to be thankful in every aspect of life; but anyhow, back to the food....


For this month's What's Baking challenge, we were requested to bake something savory by Jey, from The Jey of Cooking. So, despite my love for all things sweet, I'm always up for a challenge. I wanted to keep it simple though, considering the craziness of the holidays along with our home endeavors. So I opted for something everyone seems to like and can't get enough of, rolls. And Hubby and I love Texas Roadhouse Rolls! I only just discovered this eatery during my college years, and have always enjoyed their rolls. So when I came across these copycat rolls, I knew they were winners! I only regret that the photos are lacking, since I was photographing during Thanksgiving prep! Hope you enjoy!


4 tsp active dry yeast
1/2 cup warm water
2 cup milk
3 tbsp of melted butter,slightly cooled; plus some for brushing
1/2 cup sugar, plus one tsp
2 quarts all purpose flour (approx. 7-8 cups)
2 eggs
2 tsp salt


1. Add the yeast to a small bowl with the warm water and let dissolve. Stir in a tsp of sugar.

2. Scald the milk in a small saucepan, and let cool slightly to lukewarm. Add the cooled milk to the yeast mixture. Also, stir in the sugar, and enough flour to make batter. (The recipe I was using actually stated to make a medium batter. However, despite my baking savyness,I was unsure exactly what a medium batter entailed. I googled but to no avail. I think it's somewhere in the realm of the thickness of cake batter.)

3. Let stand until foamy, and then add in eggs, butter, and salt. Beat to incorporate.

4. Add more flour until a soft dough forms. Sprinkle some flour on the rolling surface and let the dough rest. While you are waiting, grease a large bowl and set aside. Knead the dough until you have a smooth round ball. Place the ball of dough into the greased bowl and turn over to be sure to grease both sides of the dough.

5. Cover the dough and let rise in a warm spot until it doubles in size (about an hour). Punch down the dough. Turn the dough out onto a floured surface and cut the dough into workable portions for shaping. Let the dough rest ten minutes.

6. Shape the dough into your desired forms and place onto baking sheets lined with parchment paper. How many rolls you make will greatly depend on the size you choose. I made mine rather small and managed to get about 4 1/2 dozen. Let them rise for about another 30 minutes or so, until they double in size.

7. Bake on 350 degrees for 10-15 minutes or until golden brown. Brush with melted butter immediately. (Ok, so here's a how-to-know-you-are-too-tired-to-be-baking moment. I completely omitted this step! I just forgot. The rolls were still yummy, but lacked that extra softness from the brushed tops.


You can enjoy these with some cinnamon butter (Because I had to work a little bit of sweetness in somehow!) The recipe will be coming shortly!


Source: Eat Cake for Dinner

Tuesday, November 8, 2011

Lady Bug Sugar Cookies


with some pink girly flare!

Yes, these are pink lady bug cookies, because almost everything is better in pink, is it not? But more importantly, these cookies were made for a special one year old on her birthday! I made these lovely lady bugs for my best friend's adorable little girl. We had the pleasure to visit my wonderful friend and her sweet little girl for the weekend and we had a blast! She is truly the cutest thing since cupcakes and sprinkles!

These cookies are made of lemony vanilla dough and topped with royal icing. The recipe for these cookies has similar flavorings to an earlier sugar cookie I've made on here, but is a very different. As any of you who follow my posts know, I am always on the hunt to perfect my sugar cookies recipe, which means getting the joy to try many other recipes! Whether it's a cookbook, a magazine, a blog, a friend or family's recipe, or whatever, I'll gladly give a new recipe a whirl! And my husband and family don't mind serving the taste testing committee! This particular recipe is one I've heard much positive rumblings about in the cyber world. It's courtesy of the blog, Bake at 350, which posts all things cute, sweet, and colorful! The writer is both witty and incredibly talented with a piping bag! I used her basic sugar cookie recipe, only switching out some flavorings.


Lemon Vanilla Cookies

3 cups unbleached all purpose flour
2 tsp baking powder
1 cup sugar
2 sticks (salted) butter, cold
1 egg
1 tsp vanilla extract
3/4 tsp lemon extract
1/2 tsp lemon zest

1. Start by combining the flour and baking powder in a bowl; set aside.

2. Cream butter and sugar in the bowl of a stand or electric mixer.

3. Add in egg, extracts, and zest beating after each addition.

4. Slowly add in the dry mixture, beating and scraping the bowl down frequently.

5. Be sure to give the dough a quick hand knead before rolling it out.

6. Roll out your dough and grab your favorite round cookie cutter. Transfer the cut cookies onto parchment lined baking sheets.

7. Pop the baking sheet with cookies in the freezer for just a few minutes before placing them into a 350 degree preheated oven. Bake for approximately 10-12 minutes and then allow the cookies to rest on the baking sheets for a few minutes before moving them to cooling racks.

8. Once the cookies are fully cooled, decorate the cookies with your favorite colors for lady bugs following this recipe for royal icing from a previous post on house cookies.
For these cookies, I learned how to make polka dots on flooded icing! (Polka dots are one of my favorite things !) A full post on the how-to for this fun technique will be coming soon!


Source: Bake at 350

Also featured on: Made from Scratch Tuesday

Saturday, August 27, 2011

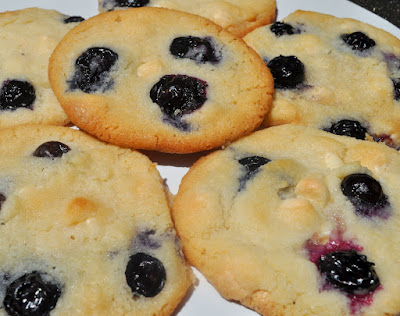
Blueberry White Chocolate Cookies


When will this craziness end? The weather has been a constantly changing threat in the area all week long. First, we begun with an earthquake (luckily with no damage). It was so foreign to NJ and NY. And now we are preparing for hurricane with some possible negative ramifications. The food stores were like a madhouse today full of scurrying customers in search of water, batteries, flashlights, generators, and food. After some likewise shopping of my own and some fun craft purchases to keep me busy during the looming possibility of a long power outage, I knew we would be in for some fun! Well, as soon as I heard we could stuck without power (translate to not being able to cook/bake), hubby and I started baking! We whipped a few batches of brownies and muffins for the family to enjoy, as well as these yummy cookies chock full of fresh, summer blueberries! These are slight adaption of white chocolate raspberry cookies made earlier this summer. They were such a huge hit with everyone, we gave them a "re-mix" with blueberries. Summer certainly has been unpredictable this year!

Jade, from The Mess Pot, hosted the What's Baking Challenge this month, and her choice was to Celebrate Summer with a nice, fresh summer recipe. So since I had some local blueberries, I simply incorporated them into part of this yummy cookie recipe.


8 oz butter (2 sticks), softened
1 cup sugar
1/2 can sweetened condensed milk (7 oz)
2 cups self-rising flour
7 oz white chocolate chips or chopped pieces
1 pint blueberries


1. Cream the butter and sugar on medium speed until well blended.

2. Add the sweetened condensed milk and continue to mix.

3. Sift in the flour slowly, while mixing it into the dough with your hands.

4. Stir in the white chocolate.

5. Take small pieces of dough and flatten it into a disk with your fingers.

6. Place a few blueberries into the middle and fold up and over.

7. Bake on parchment lined baking sheets in a 350 degree oven for about 12-15 minutes. Rotate baking sheets halfway through bake time.

8. Allow cookies to set on the baking sheet for 2-3 minutes while cooling, then transfer to wire racks to fully cool.


Source: Phil Vickery from Womenseverything.com

Also featured on: Full Plate Thursday, Foodie Friday

Tuesday, August 16, 2011

Peach Tarts


Well, the home renovation projects are underway! Life is busy and fun right now, but with all the craziness going on, it's been a quick cooking month. Here is one of my favorite easy sweet treats with fresh summer stone fruit. And it's so simple to switch out peaches to use your favorite stone fruits.


1 pkg frozen puff pastry dough, divided (or you can make your own,which is on my to-do list)
3-4 peaches, pitted and sliced thin with skin on
3 tsp rum extract, divided
3 tsp vanilla extract, divided
3 tsp cinnamon, divided
1/2 cup sugar, divided
1 tsp salt, divided
*Makes 3 tarts*

1. Allow the frozen puff pastry to thaw slightly (about 30 minutes or until pliable). Unroll the dough and cut it into thirds.

2. Roll each piece of dough out until about 1/8" thick. Transfer to baking sheet.

3. Layer the sliced peaches on the center of the dough in rough rows, leaving about an inch of dough around the exterior.

4. Fold up the sides lengthwise and then fold up the top and bottom edges. Repeat with remaining dough and peaches.


5. Sprinkle a few tablespoons sugar, 1 tsp cinnamon,a pinch of salt, 1 tsp vanilla and rum extract over each tart.

6. Bake in a 400 degree oven for 18-20 minutes or until puff pastry is golden brown. Serve with fresh whipped cream for a yummy dessert!


Enjoy!

Source: adapted from Veggie Belly
Also featured on: Made From Scratch Tuesdays, Mangia Monday, and Southern Fairytale

Thursday, July 28, 2011

Nectarine and Blueberry Scones with a Honey Butter Glaze


This month of new home demolition is crazy as ever, but we are beginning to see the progress, which is so encouraging! I'm so very excited to finally move in! Hopefully it will be next month! For now, we are busy bees getting everything ready that we can. And the best part, we are finally free of those scorching hot days!


This month's What's Baking Challenge was to Bake Local, hosted by Lindsey of Our Share of the Harvest. I'm a big fan of using local foods and supporting local businesses so this was right up my alley! I stopped by two farmer's markets and a roadside stand to get my booty for this fun recipe.
My favorite farmer's market purchase was definitely the raw fall honey. It's so different than the honey you buy at a store and it's healthier for you too! I also scored some yummy nectarines and blueberries.


I have a little funny story related here. I was planning to make a stone fruit crostata with my local bought produce for this month's challenge. I started making my normal go-to Lidia Matticchio Bastianich's recipe and, much to my dismay, the dough was not forming at all! It never harden, just stayed liquid. Yuck! I ended up throwing it away. My confidence was starting to get shaken, but I figured I have to try again anyway. So I went for attempt #2, which started out better, but the end product was still lacking. I couldn't figure it out. Why was my dough behaving so funny? The humidity in the kitchen? My ingredients were not chilled enough? Should I have used a different utensil to mix? I was truly baffled by these events!
So I let the dough chill in the fridge overnight, as per the directions. In the morning, it was none the better. I was unable to roll it out, only press it into a disc with my palms to flatten. But I had to try to bake it at this point just to see what would happen. So I threw together my fruit filling and laid in on top and rolled it all up. Finally, it looked pretty good, despite my earlier issues. I popped it in to bake hoping it would turn out well. I left the kitchen for barely a minute or two, then came back to check on it to find.... that the dough had melted! Yes, that's right, melted! Literally. It ran down the parchment, over the pan, off the sides and onto the oven floor where it had already puddled. The best part? The puddle was on FIRE! Needless to say, I was done baking that day... Well, the end of my story is that I cleaned it up and decided to make scones. I am using my mother's kitchen since we are in the middle of moving, and discovered that when I thought I was using flour, the whole time I was using confectioner's sugar!!! My mom keeps them in these large upright Tupperware containers. And I know the spot the flour lives, but apparently she switched up their order in the closet. I can't believe I didn't notice it earlier, but at least I found out why! I guess we need to purchase some labels for our containers... Thanks for listening to my crazy story and now if you are still reading this enjoy these scones! They are so sweet and full of fresh fruit; hmmm... breakfast or dessert?


3/4 cup diced nectarines, peel on
3/4 cup blueberries
4 cups all-purpose flour
2/3 cup powdered sugar
1/2 cup granulated sugar
2 tablespoons baking powder
1 teaspoon nutmeg, divided
2 teaspoons cinnamon
1 teaspoon salt
2 cup cold heavy cream, plus additional for brushing
1/3 cup honey
1/4 butter


1. Mix all the wet ingredients together in the bowl of a stand mixer.

2. In a separate bowl, whisk together all the dry ingredients.

3. Slowly add the flour into the wet mixture, stirring periodically. This dough will be quite stiff.

4. Turn the dough onto a well floured surface and knead with floured hands for a minute a two.

5. Flatten your dough slightly and press all your frozen fruits into the dough. Continue to knead for another minute or two to spread the fruit evenly through your dough.

6. Using your hands, shape the dough into a large, flattened circle. Using a floured knife cut the dough in half to form two half moons. Then cut each each half moon in thirds resulting in a total of six wedge shaped scones.

7. Now you can either place a few on a parchment lined baking sheet or you can freeze them for later use. To freeze, simply place scones on a baking sheet in freezer just long enough to harden, then transfer into freezer bags. Defrost and brush with cream when you are ready to bake them at a later date. To bake, brush them with a few tablespoons of heavy cream and place them in a 425 degree oven for about 24-26 minutes.

8. While the scones are baking away in the oven, put the honey and butter in a glass measuring cup in the microwave for 90 seconds (a minute and a half) on high, stirring once halfway through.

9. When scones are cooling, brush them with honey butter and let sit for 20 minutes then brush them again. This helps them to stay fresh for up to 4 days. It's a natural (and very sweet) replacement for preservatives!


Enjoy!


Source: Adapted from 5 Second Rule and Baking and Books

Also featured on: Made From Scratch Tuesday, Works for me Wednesday, Full Plate Thursday, Foodie Friday, Ultimate Recipe Swap

Wednesday, July 20, 2011

Guest Post- Cappuccino Chocolate Chip Muffin (My Tasty Journey)

Good morning all! I'm excited to feature my first ever, guest blog post by the lovely and talented Donna, from My Tasty Journey. Donna is a yoga obssessive fellow Jersey girl and an avid foodie and travel-crazy blogger. She very generously volunteered to make quite a few dozen of these yummy cappuccino chocolate chip muffins for the Great American bake sale I hosted back in May. And they were one of the hits of the day! Hope you enjoy her and her scrumptious baked goods.


Hi everyone! My name is Donna and I blog over at My Tasty Journey.com. Amanda had asked me to share a recipe I had made for her Share our Strength bake sale a couple months ago. I ADORE this recipe for bake sales because you can double/triple the recipe EASILY, PLUS it has enough flavors to not need any frosting. No frosting = No mess = Travels well! Not to mention, they really couldn't be simpler!

First, you gather up the usual suspects:


Cappuccino Chocolate Chip Muffins

~1 package (18 1/4 oz.) vanilla cake mix
~1 package (3.4 oz.) vanilla pudding mix
~2 teaspoons instant espresso
~1/4 cup boiling water
~1 cup milk
~1/2 cup canola oil
~4 eggs
~2 cups mini chocolate chips


1.- Combine the espresso & boiling water and stir until nearly dissolved. (It doesn't have to dissolve completely. I've never had a problem with coffee grinds in my cupcakes) Allow to cool slightly.


2
.- Next, combine the cake mix, pudding powder, eggs, milk and oil in a mixer and blend on medium speed until combined.


3.- Once everything is combined, turn your mixer to low and slowly pour in the slightly cooled coffee mixture.


4.-Beat for 3 minutes until all of the ingredients have blended completely.


5
.- Fold in the food of the gods. I mean, the chocolate chips!


...and try not to sneak too many bites of the batter. This bowl smells HEAVENLY, I promise!


6.- Pour about 1/4 cup of batter into lined cupcake trays. (not too much, these babies GROW!)


7.- Bake in a preheated 375 degree oven for 18-20 minutes or until the "toothpick test" proves they are done!


And WALLAH! Done! Each recipes yields about 2 1/2 dozen, so it's pretty simple to make a HUGE batch in a short amount of time. Try these out if you love coffee & quick recipes


--


Donna

www.mytastyjourney.com


Please feel free to stop over and visit Donna at her blog. She features everything from workout information and healthy eats, to sweet snacks and travel finds, both local and abroad. Her warm amicable spirit flows through her writing and her food leaves you happy and healthy!

Also featured on: Tasty Tuesday, Tempt My Tummy Tuesday, Made From Scratch Tuesday, Works for Me Wednesday, What's Cooking Wednesday

Tuesday, July 19, 2011

White Chocolate Raspberry Cookies


So far summer has been full of fun, change, and busy days. The humidity has been unfortunately high, but there are also days where the heat breaks and it's just beautiful! However, our past few days have looked something like this.....


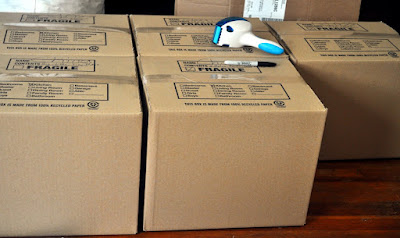
Oh, the joys of moving! More packing and less posting this month, but it will be all worth in the end, once we are fully moved in and settled in our home! It won't be for awhile, but we are making due in the process.


While all the hectic moving and construction goes on, I still managed to squeeze in some baking time this week. I made these cookies for my hubby's co-workers who were super helpful and gracious to my husband. We thanked them with these cookies, and some other treats which will be coming over the next week. Good thing I did my baking this past week, because the heat index is continually climbing. Also, tomorrow I will be featuring my first guest post so stay tuned for scrumptious cappuccino chocolate chip muffins from Donna at My Tasty Journey! Now back to the cookies...


White Chocolate Raspberry Cookies:

8 oz butter (2 sticks), softened
1 cup sugar
1/2 can sweetened condensed milk (7 oz)
2 cups self-rising flour
7 oz white chocolate chips or chopped pieces
1 pint raspberries


1. Cream the butter and sugar on medium speed until well blended.

2. Add the sweetened condensed milk and continue to mix.

3. Sift in the flour slowly, while mixing it into the dough with your hands.

4. Stir in the white chocolate.

5. Take small pieces of dough and flatten it into a disk with your fingers.

6. Place one or two raspberries into the middle and fold up and over.

7. Bake on parchment lined baking sheets in a 350 degree oven for about 12-15 minutes. Rotate baking sheets halfway through bake time.

8. Allow cookies to set on the baking sheet for 2-3 minutes while cooling, then transfer to wire racks to fully cool.


Source: Phil Vickery from Womenseverything.com

Also featured on: Mangia Monday, Mouthwatering Monday, Made From Scratch Tuesday, Tempt My Tummy Tuesday, Tasty Tuesday

Tuesday, June 28, 2011

Red, White, and Blue Mini Layer Cakes for Two


This month's What's Baking challenge, from Heather of Hezzi-D's Books and Cooks, was to bake a layer cake. And I love layer cakes! You get more icing and filling than other cakes! Why not have layers? The logic seems to work, at least for me.


Since the 4th of July is coming up just around the bend, I decided to make my layer cake patriotic with red, white, and blue components. Red was simple, because I love red velvet, blue was just a spin-off of red velvet now called blue velvet, and since hubby had just taken a trip to Junior's recently and brought me some cheesecake, I had cheesecake on the brain. The assembly resembles our wedding cake as well! Our wedding cake was chocolate and vanilla layers with actual NY cheesecake in the middle covered with chocolate ganache. Well, this is similar, red and blue velvet cake with cheesecake piped in the middle covered with white chocolate ganache. And if you are thinking to yourself, "Which was better?", all I can say is... I'm not going to argue with either one!


Cheesecake:
1 1/2 lbs cream cheese
1 1/3 cups sugar
5 large eggs
16 ounces sour cream
1/4 cup flour
2 teaspoons vanilla extract
1 teaspoons lemon juice

Cake: (Red Velvet/Blue Velvet)

2 1/2 cup cake flour
1 1/2 cup sugar
1 tsp baking soda
1 tbsp cocoa powder
1 tsp salt
2 eggs, room temp
1 1/2 cup oil
1 cup buttermilk
1 tbsp gel food color, approx.
1 1/2 tsp vanilla
1 tsp white distilled vinegar

White Chocolate Ganache:
8 oz white chocolate
2/3 cup heavy cream

*Makes 3-4 mini layer cakes*


1. Let's start with making our cheesecake, since it has to cook and cool the longest. You may recognize this cheesecake recipe from an earlier post here. It's the same minus the crust.

2. Start by creaming the softened cream cheese. Then add the sugar and eggs, one at time, while continuing to beat on low.

3. Add flour, lemon juice, and vanilla. Stir. Fold in the sour cream.

4. Pour batter in a 9" springform pan and bake on 325 degrees for about an hour and fifteen minutes. No need to be worried about cracking or appearance for this cheesecake seeing as it be piped later. Once cooled, place in fridge until time to assemble cake.

5. Now, let's work on our cakes. We are going to make red and blue velvet cakes in 9" cake pans. To do so, we are going to simply divide the batter and add red food coloring to one half and blue food coloring to the other half. If you wanted to make a few more mini cakes, you could double the recipe and dye each batch, red and blue respectively. This recipe is from an earlier post of red velvet stuffed cupcakes.

6. In a medium bowl, sift together all of the dry ingredients for the cupcakes: flour, sugar, baking soda, cocoa, and salt. Set aside.

7. In the bowl of a stand mixer add all the wet ingredients: eggs, oil, buttermilk, food coloring, vanilla, and vinegar. Beat until smooth.

8. Slowly add the dry mix into the wet mix and blend for a minute or two until fully incorporated. Pour batter into two greased and floured cake pans.

9. Bake at 350 for 28-33 or until fully done. Test with toothpick. Set aside to cool.

10. Once both the cheesecake and cakes are fully cooled, you can begin to make the white chocolate ganache. Place the white chocolate, slightly broken up, into a double boiler over low heat.

11. Stir and let chocolate melt slowly. Add in the heavy cream and continue to stir over low heat. Once fully melted, continue to stir for about 2 minutes, then remove from heat and allow to cool for about 15 minutes, stirring occasionally while cooling.

12. Time to assemble! Start by using a cookie cutter or I used a biscuit cutter to make 3 " circles. Depending on the exact shape of the pan and cutter, you will yield either three or four of each color. Place the blue circles on a baking rack. Blue cakes will be bottoms and red cakes will be tops, but you can feel free to switch 'em up!

13. Scoop cheesecake into a piping bag fit with a coupler and large round tip. Begin piping on top of each blue cake circle to fill the surface. Continue with all bottoms. Place red circles on top of the cheesecake filling to finish the cake tower.


14. By now, the ganache should be fully cooled. Be sure to place a dish or cookie sheet under the baking rack to catch the drips. Start spooning white chocolate ganache over the cakes and let it drip down the sides.


15. Depending on the thickness you desire, you may want one or two coats of ganache. I did two on mine. After the first coat, pop them in the fridge for 10 minutes and then apply second coat!
That's it! Now you have a perfect patriotic dessert for the 4th of July! Enjoy!


Also featured on: Savory Sunday, Mangia Monday,Moutherwatering Monday, Made from Scratch Tuesday, Tempt my Tummy Tuesday, This Chick Cooks

Friday, June 24, 2011

Quattro Formaggi Pizza with a Twist


So my husband is obsessed with this one pizza from our area that is a white pizza with cheddar on it. He will always hands-down choose that pizza over any others, so I figured it's about time I make it for him! I changed it up a little bit and threw in some extras so it's basically four cheese white pizza with a twist. And needless to say, Robert gave it a try and loved it! He said this pizza his new favorite. Hope you enjoy this yummy pizza!


Dough:
1 pizza crust dough, whole wheat (we bought ours for a local pizzeria, but you can make our own or buy one at the grocery store)

Sauce:
2 tbsp butter
2 tbsp flour
1 cup of heavy cream
3/4 cup of pecorino romano cheese, grated
2 tsp pepper
1 tsp nutmeg
1 tsp oregano
1 clove of garlic, crushed

Cheeses and Toppings
12 oz Mozzarella cheese, grated
8 oz Ricotta cheese
4 oz cheddar cheese, sliced
2 oz Pecorino Romano, grated
half of a fresh red pepper, cut into thin strips (or a roasted red pepper)
15 leaves of fresh spinach
1 tsp garlic powder

1. Start out by making the pizza sauce, and since this is a white pizza, it's an easy, but flavorful alfredo sauce for the pizza base.

2. Melt your butter and mix in the flour with a wooden spoon over medium heat. Keep mixing until the flour is fully dissolved into the butter (about 3 minutes).

3. Add in the heavy cream and stir to incorporate. Let cook for another minute or two while stirring.

4. Lower the heat and add in your spices; pepper, nutmeg, oregano, and crushed garlic. Stir and let simmer on very low.

5. Stir in cheese and remove from heat. Set aside to let cool.

6. While the sauce cools, start prepping our pizza dough. Shape your dough into an flat oval with your palms and place on a your work surface. Sprinkle some corn meal over the dough and flip it over. Start rolling your dough until it reaches your desired thickness.

7. Transfer your dough to a pre-heated pizza stone or a metal pizza pan/cookie sheet lightly greased with shortening and stretch it to cover the surface. (Your pizza stone should be warmed in 475 degree oven for about 10 minutes) Spread alfredo sauce onto dough.


8. Now time to start adding the cheeses! Sprinkle on the mozzarella. Next, lay the cheddar slices on top, spacing them slightly apart until you cover the pizza.


9. Using a ice cream or cookie scoop, Start scooping ricotta balls onto the pizza, keeping them spread apart. Sprinkle on pecorino romano cheese.


10. Scatter some red pepper slices and spinach leaves over the pizza. Sprinkle some garlic powder over the pizza and get ready to eat!


11. Pop that pizza in a 425 degree oven for 15-20 minutes, until the cheeses are fully melted and slightly golden brown. Hope you enjoy your pizza!


Also featured on Foodie Friday and Full Plate Thursday

Tuesday, June 21, 2011

Watermelon Fruit Basket


It's starting to get that hot streak back, which I was more than happy left those last two weeks. And while I live to bake, sometimes when it's really hot outside I just don't want to turn on the oven at all. It's on those occasions that all the no-bake desserts are my best friends.

Since it's been so warm out recently, I turned to a fruity sweet snack instead of another baked treat. This is a super easy and very fun fruit dessert to make, plus it's healthy! It can be used as a centerpiece, a dessert item, or just part of a backyard party. And all you need is a little bit of time, a knife, and a melon baller/cookie scoop.

This watermelon basket was made to celebrate my favorite uncle's recent promotion. He's now the head honcho of the east coast! We also made a cake decorated with the his company logo, but I didn't think it turned out quite cute enough for blogging. He's pretty into all things healthy so this dessert was right up his alley. Hope you enjoy this fruit basket!


1 whole watermelon
1 pint blueberries
1 pint strawberries
1 pineapple, cut into chunks
1 pint of raspberries
6 kiwis, sliced


1. The only tricky part to this endeavour is making the basket. Be sure your watermelon has a flat bottom so it will be able to stand freely and is as blemish free as possible. Begin by using a pairing knife to score the portions that are going to be cut away. You will be removing the top half of the watermelon on the outer edges. Basically, from halfway up the watermelon to the top will be completely removed except for about 3 inches in the middle for the handle.

2. Then using a sharp knife, cut out the top right and left portions, being careful to leave the middle section for what will be the handle.

3. Remove sections of pulp from inside the basket bottom and inner handle, placing them aside to later be shaped into melon balls. Continue until the watermelon is hollow.

4. Using an ice cream scoop, scrape around the hollow inside to make it even and smooth. (No need to be too fussy though, it will be covered up with all the yummy fruit soon!)

5. Using a sharp knife, begin making diagonal cuts on your handle to make the triangular edges. Continue along all the edges of the handle and basket.

6. Then start filling your basket with the fruit. Blueberries, strawberries, and raspberries can go in whole. The pineapple can simply be cut into chunks. The watermelon (and any other melon too, we usually use cantaloupe or honeydew as well) needs to be balled. Using a cookie scoop or melon baller, stick the end in the melon and turn it around full circle, then pull it out and you have a melon ball! Feel free to add in any other fruits you like as well.

7. Toss all the fruit together in your watermelon basket and you are all set! (I placed the kiwi slices on top and did not toss them in because they are more delicate.) You can also serve this with a fruit dip, like this Irish Cream Fruit Dip. If you have any leftover strawberries and blueberries, these Red, White, and Blue Berries are perfect for upcoming 4th of July parties. Enjoy!


Also featured: Mangia Mondays, Mangia Mondays, and Mouthwatering Mondays