Showing posts with label Pie. Show all posts

Saturday, January 28, 2012

Salted Caramel Pie


For this January's What's Baking Challenge, we were asked by Melissa from I Was Born to Cook, to make a snowy day sweet, which couldn't have come at a more perfect time since we just had a lil snow storm locally. My favorite part of a snow day, is cuddling inside with some warm blankets and a few good movies, and or course, some festive baking. This is a great snow day treat since the sweet and slightly salty pie is simple to make and you can't stop eating it!


1/4 cups graham cracker crumbs (about 5 ounces)
4 tablespoons unsalted butter, melted
1/4 cup light brown sugar
2 cans sweetened condensed milk (14 oz)
Fleur de sel
2 cups heavy cream
2 tablespoons confectioners' sugar


1. In a small bowl, mix the graham crackers crumbs with the melted butter and brown sugar.

2. Press the crumb mixture into a 9" pie plate. Bake at 350 degrees for 10 minutes or until golden brown. Remove and let cool.

3. In a large glass 13" x 9" baking dish, add the sweetened condensed milk. Sprinkle about 1/2 tsp fleur de sel on top of the sweetened condensed milk. Cover with foil.

4. Place the baking dish into a large roasting pan and pour hot water into the roasting pan until about 1/3 up the way of the baking dish.

5. Place in a 425 degree oven for 2 hours, stirring two or three times throughout the cooktime. Continue to replenish the hot water in the roasting pan as needed.

6. Once the condensed milk has taken on a golden caramel color and thickened as well, remove it from the oven. The mixture may be lumpy, but don't worry it will smooth out as it cools.

7. Spoon the caramel into prepared pie crusts and cover by pressing plastic wrap sprayed with vegetable oil on top of the pie. Refrigerate for at least 4 hours.

8. Whip heavy cream with powdered sugar until light and fluffy, then pile high the fresh made whipped cream onto the pie and serve!


Source: Food And Wine

Tuesday, April 27, 2010

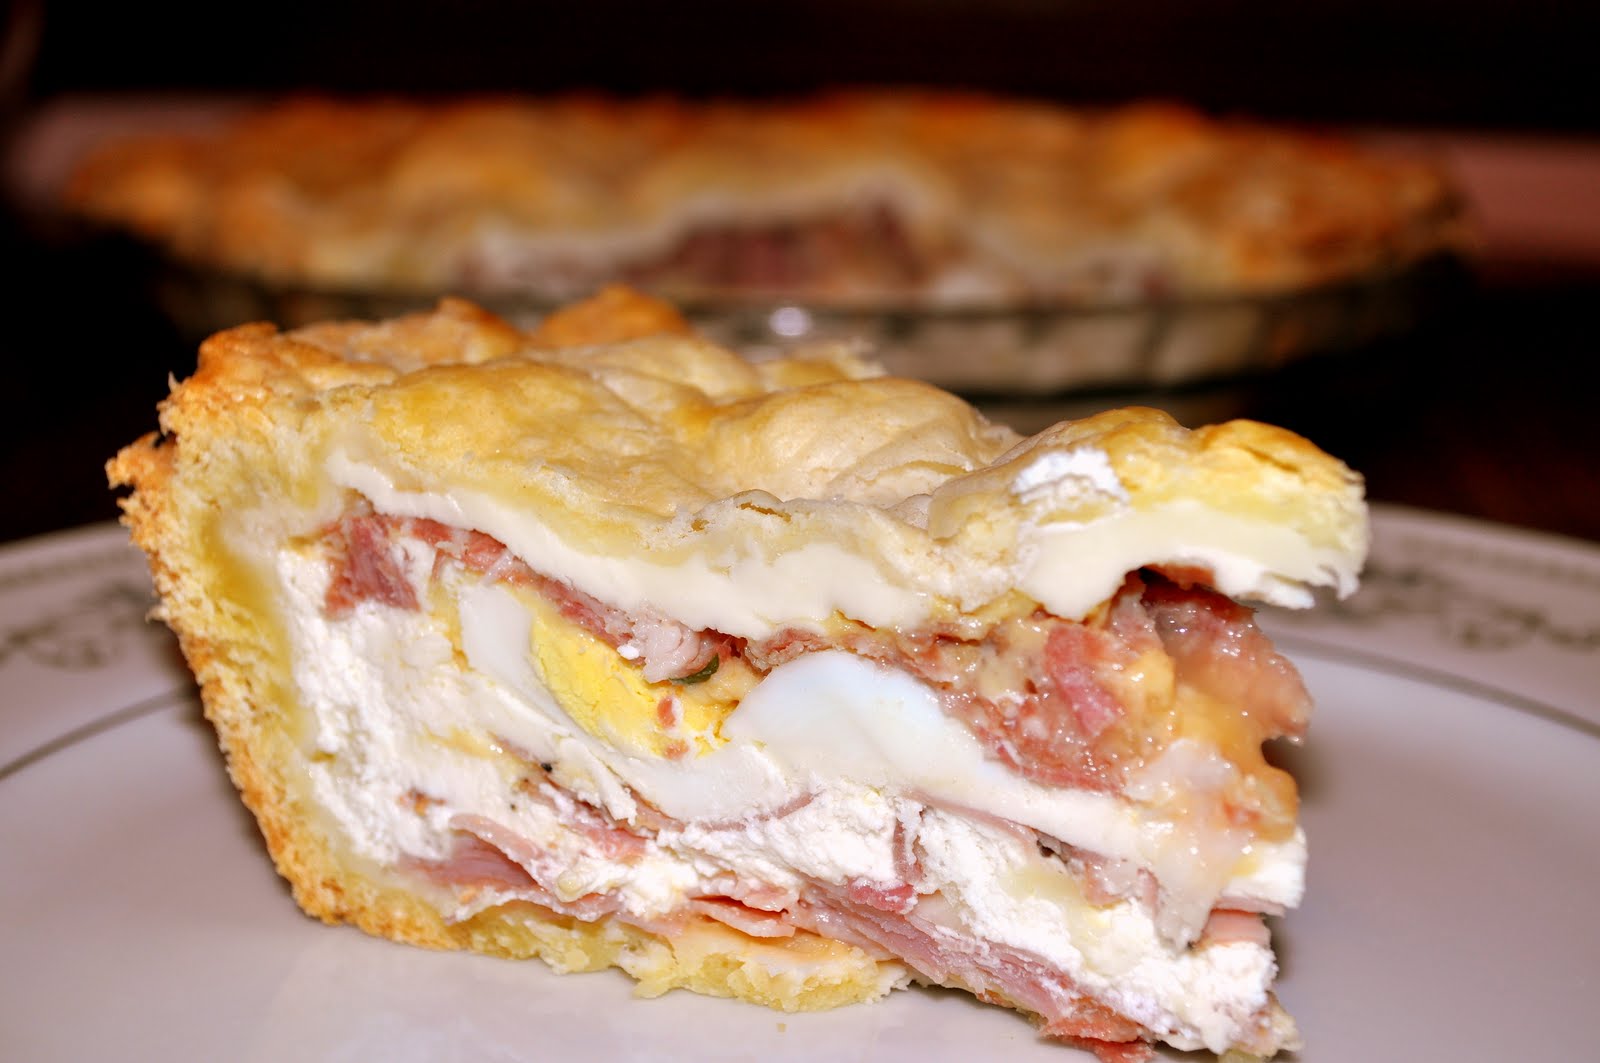
Pizzagaina (Italian Easter Pie)


Ok, well I am embarrassed to say that I have not posted any of my Easter recipes yet. So I'm a little but late as usual, but the food was fantastic so I must post it! Besides better late than never!

For those of you who have never eaten pizzagaina, it is basically a pie full of many types of traditional meats and cheeses. In my family, it is tradition that we would go to Midnight Mass with my Grandma and Grandpa and then come home and eat some. I was a picky eater and never ate any, but we always made it together and it is a great Easter tradition and way to break Lent!

This year my friend Jules and I tackled the pizzagaina making with my Mom, Aunt, and Grandma to give us guidance and advice. Here was the outcome:

Crust

2 cups all purpose flour
3/4 teaspoon salt
2 sticks unsalted butter, cut in cubes
2 eggs

Filling (so yummy I had to photograph the ingredients)

1 lb ricotta
1 1/4 pound fresh mozzarella,sliced
1/3 lb Basket Cheese,sliced (also known as Farmer's Cheese)
1 1/2 cup Pecorino Romano,grated
12 eggs, half hard-boiled and half beaten
1 lb ham
1/4 lb salami
1/4 lb capicola
1/4 lb proscuitto
1/4 lb proscuittini
3 tbsp parsley
salt, pepper

1. Make your crust! Start by mixing together the flour and salt.

2. Toss in the cubes of butter and start combining with two forks.

3. Add eggs one at a time and incorporate by hand.


4. Roll into two balls and cover with plastic wrap. Pop in the refrigerator for about an hour.

5. Meanwhile,take the slices of meat stacked and chop into sections for easier assembling.


6. Slice the hardboiled eggs as well.


7. Add parsley, salt, pepper, and pecorino to beaten eggs (6).

8. Take dough and let rest til room temp. Then roll out in two circles.

9. Press into a 9 inch pie plate or 9 inch springform pan.

10. Now here's where it gets challenging. There are two different ways to fill the inside. One way is to layer the meats,boiled eggs, and cheeses, then top with beaten eggs. The other way is to combine everything (eggs, meats, and cheeses) and pour in pan. Both sides of my family do it differently so I made one of each.

11. If you choose layering, you will want to be sure to rotate (a meat, a cheese, hard-boiled egg) and repeat until you have used them all. There is no set pattern for layering the filling.


12. If you choose to combine first, then be sure you have a large bowl, because it's a lot of food! Also, you will want to cube the hard boiled eggs to prevent them from breaking apart when mixing.


13. Either will taste great! Top with the second rolled out circle of dough. Press the edges to seal. Scallop the edges using your fingers or a fork. Also, be sure to cut vents in the pie. We got slightly creative and made a cross and a bunny on ours.


14. Brush with milk or egg to get a more glossy finish to your crust!


15. Bake at 350 for 45-50 minutes. Let cool on cookie racks.


16. On Easter, cut and serve!

Monday, March 29, 2010

Lil' Black Bottom Banana Cream Pies


Lil' Black Bottom Banana Cream Pie (adapted from Old-fashioned Banana Cream Pie)

Ingredients
1 1/2 pkg of mini pie shells
3 cups whole milk
3/4 cup white sugar
1/3 cup all-purpose flour
1/4 teaspoon salt
3 egg yolks, slightly beaten
2 tablespoons butter
1 teaspoon vanilla
3 bananas
5 oz semisweet choc chips
1 tbsp butter


1. Bake a pie shells according directions on package on a cookie sheet.

2. Scald the milk in a large pot.

3. Combine the sugar, flour and salt in a separate pot.

4. Gradually stir in the scalded milk. Continue stirring until thickened.

5. Cover and cook for a few more minutes.

6. Beat three egg yolks in a separate bowl. Temper with some of the hot milk mixture. Add egg mixture into the pot.

7. Cook another minute to combine. Remove from heat.

8. Stir in butter and vanilla.

9. Let cool to room temperature.

10. Heat chocolate chips in double boiler or microwave. Add butter and stir.

11. Plop one tbsp on chocolate into each pie shell.


12. Slice bananas and place one on top of the chocolate.

13. Stir bananas into banana cream.

14. Pour into shells and keep refrigerated.


15. Serve with whipped cream.