Showing posts with label Cake. Show all posts

Wednesday, January 8, 2014

Football Pull-Apart Cake

With football season upon us, it's time to start thinking about the best part of football season, the food. Here is a fun little cake I made for a Packer's game. My family have been long time Packers fans and I am a fan of making football theme food. So enjoy this football pull-apart cake.


For cupcakes:
My Vanilla cake mix
3/4 cup water
2 tsp vanilla
1/2 cup softened butter
3 eggs


For chocolate ganache:
1 cup bittersweet chocolate, chopped
1/2 cup heavy cream
white decorating icing
colored candies (M&M, Reese's Pieces)


1. Mix all ingredients for cake in a large bowl to combine.

2. Line cupcake pan with wrappers and scoop batter in each cup (about 2/3 full).

3. Bake in a 350 degree oven for 12-15 mins. Let cool.

4. While cupcakes cool, heat heavy cream in microwave for about 2 minutes. Pour over chopped chocolate and let it sit about 5 minutes.

5. Stir thoroughly until chocolate and cream are fully incorporated. Let cool. Beat on medium high speed for a minute or two, until fluffy and spreadable.

6. Arrange cupcakes in a football shape on a cake plate or baking sheet. Spoon dollops of whipped frosting all over the cupcakes. Use a knife to carefully spread frosting across all the cupcakes tops, like they are one unit. If the frosting is not spreading easily, dip the knife in a cup of hot water and then try again.

7. Fully cover the cupcake cake with frosting and even out the frosting. Sprinkle candies around the edge and pipe on football ties in the middle. Enjoy!


Wednesday, March 6, 2013

Easter Bunny Cake

 
Easter is coming quickly and soon you will be planning a menu for the holiday. For a fun Easter dessert, try this Easter Bunny cake. You can make the cake from scratch or from a mix depending on your preference.

For cake:
1 batch of vanilla dry cake mix
3/4 cup water
2 tsp vanilla
1/2 cup softened butter
3 eggs

For icing and decorating:
12 oz cream cheese
1 1/2 cups butter
1 1/2 tsp vanilla
10 oz coconut
jelly beans
green food coloring


1.In a large mixing bowl, take your cake mix and add in 3/4 cup water, 2 tsp vanilla, 1/2 cup softened butter, and 3 eggs.

2. Combine well and pour into two 8" round cake pans with parchment. *You only need one 8" cake, but the recipe makes two, so you will have an extra round cake.* Bake on 350 degrees until toothpick comes out clean, for about 20-25 mins.

3.While the cake is baking, make frosting by beating the butter, cream cheese, and vanilla together. Add in sugar and continue beating until light and fluffy. Set aside in refrigerator.

4. Let cake cool and then remove from pans. Take one of the round cakes and cut in the half. Then stand them up vertically, side by side, so it is shaped like a half circle.

5. Using a sharp knife, cut and remove a small "v-shaped" section of cake to form two humps (head/body). Take the piece of removed cake and round it. Place at the back for a tail.

6. Take a portion of coconut and mix with a few drops of green food coloring for the grass.

7. Frost entire cake and gently press white coconut all around cake and sprinkle green colored coconut around the cake, on the base. Press two black jelly beans into the face for eyes and an orange one for a nose. Toss a few jelly beans around the cake in the green coconut grass.

8. I made ears from a plain piece of paper cut into bunny ear shape and covered the bottoms in foil. Insert paper ears behind the head. (I believe I made the ears a bit too big, so next time I'll try for a little smaller.)

Monday, February 25, 2013

Cake Mix from Scratch (Vanilla and Chocolate)


So I have some time to make up for here. It's been quite some time since I've had time to blog. Mind you not that I haven't been in my kitchen. Since we moved into our house, I have no doubt spent more time here than anywhere and I love my kitchen! I've missed blogging and sharing all the yummy foods that get made in this kitchen. And I will be filling in new post with recipes I have made and been storing up for blogging!

I have a love/hate relationship with easy baking items, like pre-made cookie dough or boxed cake mix. The lazy side of me LOVES it because I can whip it out quickly and still add some extra touches or twists to make them my style. However, most of me, argues that I prefer homemade always and will usually go through painstaking and strange routes to find just the right size piping tip or a strange, hard to find ingredient to make something myself. And I do always enjoying knowing that I made it and that I know the quality and freshness of what goes in my food. So I found where the two meet. My own prepared cake mix. My own ingredients packaged for when I want them. And for this month's What's Baking challenge Stephanie, from Brownies and Blondies, challenged us to make a homemade convenience item for baking and this is mine.


For our 4th wedding anniversary, I made a quick attempt to make a mini version of our wedding cake. Luckily, I had made some of these dry cake mixes because the week before our anniversary, my hubby and I both came down with something and were not feeling well at all so I didn't have as much time I wanted to bake.  Our wedding cake was chocolate and vanilla layers with a cheesecake layer in the middle covered in chocolate ganache. I used my chocolate ganache recipe from the giant peanut butter cookie to pour over the cake and a new cheesecake recipe (which I will post later) that was more dense and sturdy for the middle.

Vanilla Dry Cake Mix

2 cups all purpose flour
1 1/2 cup sugar
1 tbsp baking powder
1/2 cup nonfat dry milk


Chocolate Dry Cake Mix

3 cups all purpose flour
2 cups sugar
8 tbsp cocoa
2 tsp baking soda
2 tsp salt


For both mixes, simply combine all the ingredients for each mix and then store in an air tight container such as a ziploc bag or mason jar. Then label with date and instructions for a later time. The mixes can be stored for months in your pantry and will make 2 - 8" inch cakes or 24 cupcakes, similar to a boxed cake mix.


Vanilla Cake:
In a large mixing bowl, take your cake mix and add in 3/4 cup water, 2 tsp vanilla, 1/2 cup softened butter, and 3 eggs. Combine well and bake on 350 degrees until toothpick comes out clean. For 8" cakes 20-25 mins and for cupcakes 12-15 mins.


Chocolate Cake:
In a large mixing bowl, take your cake mix and add in 2 cups cold water, 2 tsp vanilla, 2 tbsp vinegar, and 3/4 cup of oil. Combine well and bake on 375 degrees for 20-25 mins for 8" cakes or 11-13 mins for cupcakes.


Sources: Adapted from Chickens in the Road and A Thrifty Mom

Tuesday, June 28, 2011

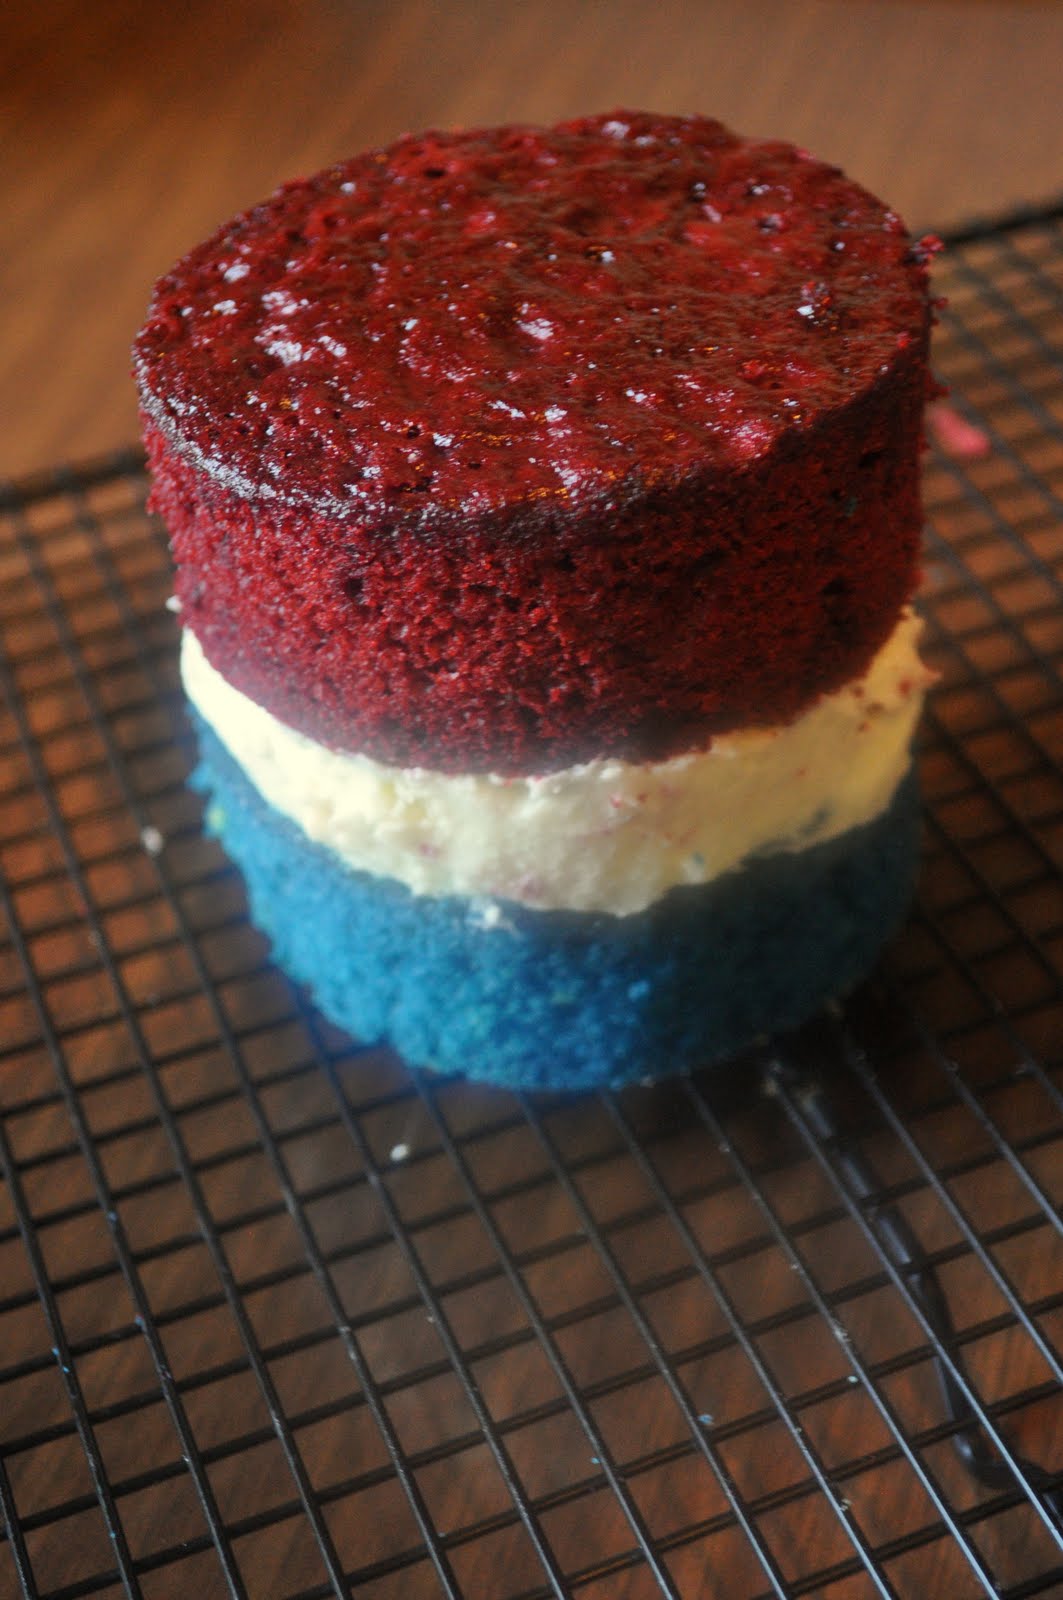
Red, White, and Blue Mini Layer Cakes for Two


This month's What's Baking challenge, from Heather of Hezzi-D's Books and Cooks, was to bake a layer cake. And I love layer cakes! You get more icing and filling than other cakes! Why not have layers? The logic seems to work, at least for me.


Since the 4th of July is coming up just around the bend, I decided to make my layer cake patriotic with red, white, and blue components. Red was simple, because I love red velvet, blue was just a spin-off of red velvet now called blue velvet, and since hubby had just taken a trip to Junior's recently and brought me some cheesecake, I had cheesecake on the brain. The assembly resembles our wedding cake as well! Our wedding cake was chocolate and vanilla layers with actual NY cheesecake in the middle covered with chocolate ganache. Well, this is similar, red and blue velvet cake with cheesecake piped in the middle covered with white chocolate ganache. And if you are thinking to yourself, "Which was better?", all I can say is... I'm not going to argue with either one!


Cheesecake:
1 1/2 lbs cream cheese
1 1/3 cups sugar
5 large eggs
16 ounces sour cream
1/4 cup flour
2 teaspoons vanilla extract
1 teaspoons lemon juice

Cake: (Red Velvet/Blue Velvet)

2 1/2 cup cake flour
1 1/2 cup sugar
1 tsp baking soda
1 tbsp cocoa powder
1 tsp salt
2 eggs, room temp
1 1/2 cup oil
1 cup buttermilk
1 tbsp gel food color, approx.
1 1/2 tsp vanilla
1 tsp white distilled vinegar

White Chocolate Ganache:
8 oz white chocolate
2/3 cup heavy cream

*Makes 3-4 mini layer cakes*


1. Let's start with making our cheesecake, since it has to cook and cool the longest. You may recognize this cheesecake recipe from an earlier post here. It's the same minus the crust.

2. Start by creaming the softened cream cheese. Then add the sugar and eggs, one at time, while continuing to beat on low.

3. Add flour, lemon juice, and vanilla. Stir. Fold in the sour cream.

4. Pour batter in a 9" springform pan and bake on 325 degrees for about an hour and fifteen minutes. No need to be worried about cracking or appearance for this cheesecake seeing as it be piped later. Once cooled, place in fridge until time to assemble cake.

5. Now, let's work on our cakes. We are going to make red and blue velvet cakes in 9" cake pans. To do so, we are going to simply divide the batter and add red food coloring to one half and blue food coloring to the other half. If you wanted to make a few more mini cakes, you could double the recipe and dye each batch, red and blue respectively. This recipe is from an earlier post of red velvet stuffed cupcakes.

6. In a medium bowl, sift together all of the dry ingredients for the cupcakes: flour, sugar, baking soda, cocoa, and salt. Set aside.

7. In the bowl of a stand mixer add all the wet ingredients: eggs, oil, buttermilk, food coloring, vanilla, and vinegar. Beat until smooth.

8. Slowly add the dry mix into the wet mix and blend for a minute or two until fully incorporated. Pour batter into two greased and floured cake pans.

9. Bake at 350 for 28-33 or until fully done. Test with toothpick. Set aside to cool.

10. Once both the cheesecake and cakes are fully cooled, you can begin to make the white chocolate ganache. Place the white chocolate, slightly broken up, into a double boiler over low heat.

11. Stir and let chocolate melt slowly. Add in the heavy cream and continue to stir over low heat. Once fully melted, continue to stir for about 2 minutes, then remove from heat and allow to cool for about 15 minutes, stirring occasionally while cooling.

12. Time to assemble! Start by using a cookie cutter or I used a biscuit cutter to make 3 " circles. Depending on the exact shape of the pan and cutter, you will yield either three or four of each color. Place the blue circles on a baking rack. Blue cakes will be bottoms and red cakes will be tops, but you can feel free to switch 'em up!

13. Scoop cheesecake into a piping bag fit with a coupler and large round tip. Begin piping on top of each blue cake circle to fill the surface. Continue with all bottoms. Place red circles on top of the cheesecake filling to finish the cake tower.


14. By now, the ganache should be fully cooled. Be sure to place a dish or cookie sheet under the baking rack to catch the drips. Start spooning white chocolate ganache over the cakes and let it drip down the sides.


15. Depending on the thickness you desire, you may want one or two coats of ganache. I did two on mine. After the first coat, pop them in the fridge for 10 minutes and then apply second coat!
That's it! Now you have a perfect patriotic dessert for the 4th of July! Enjoy!


Also featured on: Savory Sunday, Mangia Monday,Moutherwatering Monday, Made from Scratch Tuesday, Tempt my Tummy Tuesday, This Chick Cooks

Saturday, January 1, 2011

Monkey Bread

Follow my blog with bloglovin

Another great breakfast that is so fun and easy; Great for New Year's Morning! Monkey Bread is one of my husband's favorites. I mean, how it could it not be? Sugar and cinnamon caramelized in the oven is a great way to start the day, especially a day off of work!


2 large cans (16.3 ounces) refrigerated biscuits
1 cup (2 sticks) unsalted butter, melted
1 1/2 cups sugar
2 tablespoons cinnamon
1/2 cup pecan halves (I omitted the pecans)

1. Preheat the oven to 350. Grease a bundt pan or tube pan with non-stick spray.

2. In a small bowl, combine the sugar and cinnamon. Set aside.

3. Cut the biscuits into quarters. Dip each piece in butter, roll it in cinnamon sugar, and place it in the pan. Sprinkle pecans onto the biscuit pieces at random. Pour any remaining butter evenly over the biscuit pieces in the pan.

4. Bake for about 40 minutes or until the top springs back when touched. Cool in the pan on a wire rack for 10 minutes. Invert onto a plate, and serve immediately. I also made a cream cheese icing to have on the side for dipping!

Recipe taken from: Ezra Pound Cake

Wednesday, November 17, 2010

Cinnamon Buttercream Bundt Cake


1 lb unsalted butter, softened
2 1/2 cups powdered sugar
6 eggs, room temperature
2 tsp lemon juice
2 tbsp vanilla
4 cups all purpose flour
1 tbsp baking powder
1/4 tsp salt
1/4 cup brown sugar
1/8 cup cinnamon
1/8 cup sugar
1 1/2 cup powdered sugar
1/2 cup milk

1. In a large stand mixer, beat butter with paddle attachment until light and fluffy.

2. Slowly mix in powdered sugar and eggs, one a time, on medium speed.

3. Stir in the vanilla and lemon juice.

4. Mix flour, salt, and baking powder in a separate bowl. Gradually beat flour mixture into stand mixer.

5. Mix brown sugar, sugar, and cinnamon in a small bowl. Set aside.

6. Generously grease a 10 inch tube pan with butter/Crisco and flour.

7. Fill the pan halfway with batter. Sprinkle cinnamon sugar mixture on top of batter. Spoon on more batter, sprinkle more cinnamon sugar. Continue pattern until the pan is full.

8. Bake in a 350 degree oven for one hour 20 minutes or done. Cool on rack.

9. In a small bowl beat milk and powdered sugar with a fork until welly mixed. Drizzle over cooled bundt cake and let set. Then eat and enjoy!
Adapted from Pillsbury's Best of the Bake Off 1996 edition, Buttercream Pound Cake

Tuesday, November 16, 2010

Meeting Bakerella and Cake Balls

When I heard Bakerella was coming to New Jersey I was so excited and knew I needed to go! I love, love her website and all the incredibly cute confections she makes. She was hosting a signing for her new book, Cake Pops, in Williams Sonoma.


It started with a demonstration of different techniques and tips. Robert and I were late, as usual, and missed the first few minutes. She was very friendly and answered people's questions.


Then we hopped in line to get our book signed and, since we were late, we waited till the end of the line, which wasn't really bad. The line moved quickly and we chatted with some interesting people. I met Katie, from Tuesdays with Katie, who is a local food blogger as well. Then I got to meet to Bakerella and have her sign my book!


Bakerella was very cheerful and friendly. She chatted with everyone and took pictures. I even got Robert to take a picture with us. What a good husband! He waited in line with me and took pictures.


Cake Balls


Cake balls are super sweet, moist, and covered in chocolate! The steps are simple, but time consuming! It uses all ingredients that you have in your home. If you have never made them, it's fun, so give it a try!


9 x 13 Cake from 1 box of cake mix or homemade cake
About 10 oz of Frosting
Chocolate (for dipping)
Decorations


1. Take your already baked and cooled cake and cut it into four quarters. Hold two pieces and rub them together over a large bowl to make the cake crumble. Continue crumbling all the cake. If you only need a few cake balls then wrap the two other squares of cake into plastic wrap and freeze them to make more cake balls later. (A large batch makes just about 50 cake balls, so halving the recipe to use only two quarters will make 20-25 cake balls.)

2. Mix in your favorite frosting until the icing can hold together the cake crumbles. The icing binds everything together well. Remember if you are making a half batch to also halve the icing.

3. Using hands, roll into cake balls and place on a parchment lined cookie sheet. Let chill in the freezer for 20 minutes or in the fridge for a few hours.

4. Melt desired chocolate till smooth and dip cake balls into chocolate. Let set on parchment covered sheets. Sprinkle any decorations on that you like, sprinkles, coconut, nuts, etc. You can also drizzle some chocolate on covered cake balls. ( More ideas for cake balls and cake pops @ Bakerella's website )


Also featured on :


Tempt my Tummy TuesdaysTop Ten {Tuesday}

Friday, July 9, 2010

Sugared Flowers


A foodie, I am.

A baker, I am trying hard to be.

A wedding cake decorator, I am not but certainly wish to be.


But can I decorate a cake with these sugared flowers? Well, that is much simpler and more achievable for me. Do I hope to make some fantastic, fancy, fondant covered cakes some day? Oh YES! I will someday and hopefully it is soon, but for now, I stick with what I know.


All you need to sugar flowers is: well, the obvious, flowers (be sure they are edible flowers), egg whites, vanilla, and caster (superfine) sugar. If you don't have caster sugar, you can put granulated sugar in a food processor to acquire the smaller granules.


1. First, combine one or two egg whites with a 1 tsp of vanilla, depending on how many flowers you want to decorate you may want to double this batch. I sugared about ten flowers using these amounts.

2.Wipe your flowers with a damp paper towel to be sure they clean.

3. Brush each petal gently with egg white mixture.

4. Then sprinkle with caster sugar until welly covered.

5. Let sit for a minute or two then brush/shake off excess sugar.

6. Allow the flowers to dry for an hour or two, preferably longer.

Then decorate a cake, cupcakes, anything you like! See it's that easy!

Monday, June 28, 2010

Crumb Cake


So I asked my little brother what he wanted to have for dessert since it was his birthday weekend and he decided it was crumb cake. Now I have made many crumb cakes before but my crumbs always seem to be lame, not big enough. When I eat crumb cake, I want it to be similar to it's name, crumb + cake. In my interpretation, that means the cake should be proportioned half crumbs and half cake, not lots of cake and some crumb topping. So after some research about how to make good crumbs, I found this recipe from an old newspaper cutout my great aunt had saved. And these are some serious crumbs!


And by the end of the party there was no a crumb in sight...


Cake (This is my way I usually do cake. I sub in other ingredients to make the most of the box. I have yet to find a from scratch recipe that I like better.)

1 white cake mix
appropriate amount of oil and eggs per box
buttermilk to substitute for amount of water
1 tsp vanilla

Crumbs

3 sticks of butter
4 cups of flour
3/4 cup sugar
3/4 brown sugar
4-5 tbsp cinnamon
2 tsp vanilla


1. Mix the ingredients for the cake mix together and beat on medium for 1-2 minutes. Pour into a greased 13x9 baking pan. ) I did this recipe in a 16x11 pan and double the batter.

2. Let bake on 350 until at least half done. The cake must bake until it is firm enough to hold up the weight of these ginormous crumbs.

3. While the cake is baking, let's get the crumbs ready. First melt the butter in one bowl and mix together all the dry ingredients in another.

4. Add vanilla to melted butter and slowly drizzle into dry mix while continually stirring.

5. Sprinkle crumbs over the top of the cake and then pop back in the oven to finish baking.

6. Bake until toothpick comes out clean.


Wednesday, March 3, 2010

The Cat's Red and White Hat Cake


March 2nd was Dr. Seuss' birthday, so my kindergarteners and I made Cat in the Hat's Hat Cake. It came out quite cute; I wanted to take more pictures, but I was busy helping my students. Happy Birthday Dr. Seuss!!! We also made the Pink Yink's ink. It came out great, but the kids liked the cake much better.

Ok, this is the simplest recipe ever.

Get a cookie (sugar would be ideal since they are white but I couldn't find any so we used snickerdoodles).

Put a tiny dollop of white icing on top to hold the cake on tightly.

Bake 2 strawberry cake mixes in a large jelly roll pan and 2 white cake mixes in the same manner. The cakes should be only about 1 - 1 1/2 inch high.

Ice the strawberry sheet cake with strawberry or pink dyed vanilla icing. Ice the white sheet cake with vanilla or cream cheese icing.

Take a round cookie cutter with a diameter a bit smaller than the cookie and cut out the cake and stack.

Strawberry, then white, then strawberry, and then white.

Tada! The hat cake!

I didn't get the best pictures, but they looked so cute and all the kids loved them!