I made these Baseball Cookies for my best friend's son on his first birthday. Her whole family is huge Phillies fans and the baseball themed party was such a fun idea! It was a great day to celebrate with dear friends!
Showing posts with label Cookies. Show all posts
Wednesday, March 12, 2014
Baseball Cookie Favors
Tuesday, February 25, 2014
5 years and counting, Love sugar cookies
My husband, my best friend, my always helping and fun partner, my favorite person has dealt with me for five fun years of marriage.Yep, five years since we said I Do. It's a long time. We have laughed and cried together. And I'm so blessed to go through life with him. He's just the coolest guy in every way.
My husband is "that guy". That guy who holds open doors and cares for everyone. That guy who likes spending time with me as much as possible. He's that guy who cares for my friends and family like they are his own. He's that guy who always wants to help the world and will lend a helping hand to anyone. He's that guy who's can build a wall or fix or a door, but will also helps with fill piping bags and ice cookies (and he's good at both!). He's the guy who reads devotions to me at night even though he's tired and always thinks of my needs above his own. He's that guy who works hard and loves his job and his students.
So yeah, he's pretty awesome.
And I'm pretty lucky.
Here's to many more years together! Happy 5th anniversary Robert!
Our church had it's Valentine's banquet on our five year anniversary and I was making some desserts. So wisely, I made a few extras for us to celebrate with. It was pure genius to get married right after Valentine's day and not at all because it was when we had off for president's day...
It may seem like many steps, but it really isn't bad.
I have been experimenting with a many bakers, bloggers, and other talented individuals' sugar cookie recipes and I have found my favorite. At least for now. The very talented Bridget, from Bake at 350, has a fantastic recipe which I will be sharing with detailed photos soon. Go check out her blog. It's amazing!
And for some royal icing tips and trick, Sugarbelle has opened my eyes to whole new world. Many helpful tricks for decorating with royal icing. My favorite part... NOT SIFTING! I have been sifting sugar like an idiot all this time and guess what? It made no difference. Perfect Royal Icing without sifting. Thank you Sugarbelle!
Happy belated Valentine's Day and remember to appreciate those in your life worthy of love!
Labels:
Cookies,
Edible Favors,
Holiday Food,
Royal Icing
Tuesday, February 11, 2014
Boy or Girl? Baby Shower Onesie Cookies
I stole this photo from the lovely host and grandmother to be because it was too cute to not share.
In case you can't tell, I really liked these cookies...
Well, if you have to be obsessed with something, it can't be better than cute cookies!
Monday, December 30, 2013
Christmas Sugar Cookies with Glaze Icing
Every year our family has a Christmas party with all of my Grandpa's family. His brothers and sisters and all their kids, grandkids, and now even great grandkids, get together to eat, dance, and take tons of pictures. It's such a nice gathering and tradition that we all love. We always make my Grandma's classic cookies (which I'm planning to share soon) and I also made these Christmas shaped sugar cookies.As you know, I love making cutout cookies so much. I have made many shapes, sizes, and kinds, but the materials are generally the same, sugar cookies + royal icing= decorated sugar cookies. Now I love this formula for making decorated sugar cookies, but I will admit when making a large batch of say, 100 cookies or so, it can be time consuming. And though I do enjoy taking the time to decorate, design, and be creative sometimes you don't have as much time to dedicate to decorating. So here comes the perfect solution for quicker cookie decorating that is still terribly cute. Instead of royal icing or fondant, try this glaze icing. It's so very simple and looks great. It hardens to a stackable point, similar to royal icing, but not quite as stiff. Give it a try next time you are pinched for time or just want to try a new kind of decorating.

For our What's Baking challenge for December, Jenna from Jenna's Cooking Journey, chose Christmas traditions and there is nothing more Christmas to me and my family than Christmas family parties and cookies. Enjoy these Christmas cut-out cookies with glaze icing.
Also I know I'm little behind but Merry Christmas to all of you and I hope that 2014 brings many blessings to you!
Cookie Dough:
1 cup sugar
2 sticks butter, cut into cubes
1 egg
2 tsp vanilla
1 tsp almond extract
3 cups flour
2 tsp baking powder
pinch of salt
Glaze:
2 cups powdered sugar
1 tbsp corn syrup
2 tbsp milk or water
1 tsp clear extract (vanilla or almond)
green gel food dye
sprinkles/sugar crystals
1. Cream butter and sugar on high until well mixed. Add in egg and extracts and continue to beat.
2. Slowly add in dry ingredients while mixing. Remember to scrape down sides of the bowl.
3. Knead the dough briefly and roll out on a floured surface. Cut into your desired shape using cookie cutters.
4. Place on parchment lined baking sheets and bake in 350 degree oven for 9-11 minutes, until very slightly golden brown.
5. Set cookies on racks to cool while making glaze.
6. Mix powdered sugar, corn syrup, and milk in a bowl. If your glaze is too thick, add 1 tsp more milk or water and if it becomes to too thin add some powdered sugar. (For candy canes and Christmas trees, make one batch regular white glaze and a second batch with green dye)
7. To decorate, put glaze in ziploc or piping bag and cover cookies with glaze and use a utensil to help spread and smooth out glaze. Use festive sprinkles or sugar crystal to decorate if desired. Let glaze set up on baking racks until fully dry and hardened.
Source: Bake at 350 and Baked Bree
Labels:
Christmas Cookies,
Cookies,
Edible Favors,
What's Baking
Wednesday, December 11, 2013
Spiced Brown Sugar Cookies- The Great Food Blogger Cookie Swap 2013
I had the joy of getting cookies from three lovely, talented bakers all across the US (literally... Florida, Texas, and Cali) and each one was unique and delicious! Here's a quick peek at what I got in the mail this past week....
First cookie delivery- A medley of Christmas cookies from Laurie at Food is Love. I had the pleasure of enjoying red and green velvet cookies, banana split cookies, and caramel brownie cookies. It was such a nice surprise after a long day to come to these on my doorstep!
Second cookie delivery- Delicious Rugelach from Emily at Totes Delishy. These were my mom's favorite! She tasted them and tried to steal them all! These were waiting for me in the morning so I decided they could count as a special breakfast treat!
Third cookie delivery- Peanut Butter Cup cookies from Diana at Life Tastes So Good. Peanut butter cups are one of my all time favorite foods so needless to say, I was a big fan of these cookies! They made for a perfect snow day snack!
Now finally onto the cookies I shared for the Great Food Blogger Cookie Swap! I made these spiced brown sugar cookies which were similar to a snickerdoodle mixed with a cinnamon-gingersnap cookie. And they were so good!
3 cups flour
2 tsp baking powder
1/2 tsp salt
1 tsp cinnamon
1/4 tsp pumpkin pie spice
1/2 cup sugar
1/2 cup brown sugar
2 sticks butter, softened
1 egg
2 tsp vanilla
Green and red sugar crystals
1. Beat butter and sugar on medium speed until light and fluffy. Add in egg and vanilla and continue to beat.
2. Mix flour, baking powder, cinnamon, pumpkin pie spice, and salt in a separate bowl. Slowly add dry mix while beating on low.
3. Wrap ball of dough in plastic wrap and refrigerate for 15 minutes. Take out of fridge and roll into balls then flatten with your hand. These cookies retain their shape well.
4. Place on parchment lined sheet and sprinkle with red and green sugar crystals. Bake on 350 degrees for 10 minutes. Allow a few minutes to set on baking sheet and them remove to cool.
Labels:
Baked Good,
Christmas Cookies,
Cookies,
Holiday Food
Tuesday, October 1, 2013
Bachlorette Party Cookies
I had the pleasure to make some treats for a sweet friend of mine's bachlorette party last weekend. We had a great time getting pampered and massaged, then having a fantastic Italian dinner, a limo ride, and dancing to end the night. For such an occasion as this, I thought lingerie cookies would be perfect! Best wishes to my lovely Krista and her future husband!
Thursday, September 12, 2013
Baby Elephant Sugar Cookies
I had the honor of making favors for my cousin's baby shower.
I am so excited to meet this sweet lil boy in a month!
The baby's room theme will be baby elephants so that's what I made for favors.
Best wishes to Gaby and Vin and lil peanut!
Here are the sugar cookie elephants ready to be baked.
And here is the final product, all wrapped and ready!
Labels:
Baked Good,
Cookies,
Edible Favors,
Royal Icing,
Sugar Cookies
Thursday, August 29, 2013
Italian Butter Cookies
So after years of searching and trying out recipes, I found a fantastic recipe which is as close as possible to the cookies from this bakery. They are simple butter cookies that start with an almond paste base. You can find them at almost any bakery in NJ or NY, but I have never mastered them myself until recently. And I have the approval of one of my best friends, who is also addicted to these cookies, and from everyone at the bridal shower of a close friend, so they were a total hit!
The real difference I learned with other recipes and attempts was whether to use butter or shortening. It ends up the recipe I found uses both, butter and shortening, as well as almond paste to make a great mixture of flavor and texture. This cookie is both crumbly but not too dry and just melts in your mouth. Hope you love these as much as I do!
For this month's What's Baking challenge, Nicole, from Seven ate Nine, choose Italian theme and I was thrilled! Being fully Italian and growing up cooking, eating, and loving all things Italian, this is my favorite challenge yet. So I am here to share the best Italian butter cookie recipe I have found! Mangia!
1 stick butter, softened
1/2 cup shortening
1 cup plus 2 tbsp confectioners' sugar (sifted)
4 egg whites3 oz almond paste
pinch of salt
1 tsp almond extract
2 tsp vanilla extract
3 1/4 cup flour
1/4 tsp baking powder
1/4 cup cocoa powder (optional)
Optional toppings and decorations:
1 cup bittersweet chocolate, chopped and 1/3 cup heavy cream (for making ganache)
sprinkles
maraschino cherries, drained and cut in half
jams
1. In a mixer with paddle attachment, beat just the almond paste on medium high until it becomes soft. (Wish I had the homemade kind, but I just used the canned one) Then add the butter and shortening and continue to cream them all together. *It is important that the butter is room temp
2. Add in the confectioners' sugar while mixing on medium to incorporate. Scrape down the sides of the bowl.
3. Continue by adding in egg whites and extracts slowly and keep mixing on medium. Scrape down sides of the bowl.
4. Sift in the dry ingredients (flour, baking powder, and salt) together in the mixer until blended in and stop. If you would like all or part of your dough to be chocolate, add in cocoa powder. I made half of mine chocolate and kept half vanilla.
5. Fit pastry bag with a large star tip and fill with dough. Line baking sheets with parchment paper.
Begin to pipe star, shells, or fingers. Try to keep your baking sheets with similar shapes to not alter cooking time, because the thicker and bigger cookies will of course bake slightly longer.
*If making star/rosette shapes cookies, you can add a maraschino cherry to the center of each cookie or cover with sprinkles.
6. Bake cookies in 350 degree oven for 12-15 minutes. Remove from sheets and let completely cool on drying racks.
7. Now onto decorating, the fun part! For the star/rosette cookies they were decorated before baking with sprinkles or a cherry. The fingers are traditionally done with either jam or chocolate ganache filling, but feel free to experiment with your own ideas. I used a raspberry preserve in a ziploc bag with a small cut on the tip to fill the vanilla fingers. Just squeeze the jam in the middle of the flat side of the cookie and then place another flat side down on top to make a sandwich. For the chocolate fingers, I used chocolate ganache. It is made my simply heating whipping cream in microwave for approx. 2-3 minutes until hot then pouring over chopped chocolate. Allow it to sit for 4 minutes then stir until smooth and thick. Using a spoon, I spread the ganache in the middle of the finger cookie and top some of the vanilla finger cookies. The shells are simply dipped in the remaining ganache and then sprinkled. Allow all the cookies with ganache to set fully.
My favorites were the vanilla shells with ganache and sprinkles, vanilla fingers with raspberry jam, chocolate fingers
with chocolate ganache, and chocolate rosettes with maraschino cherries. Enjoy! What are your favorite kinds! If you make a variation of this recipe or try new shapes and toppings, please share them! I love to see new inventions of old favorites. My next project, might be cream cheese (cheesecake like) filling.
Source: Woodland Bakery in Chatham, NJ's website
Labels:
Baked Good,
Challenges,
Chocolate,
Chocolate Ganache,
Cookies,
Dessert,
What's Baking
Monday, May 13, 2013
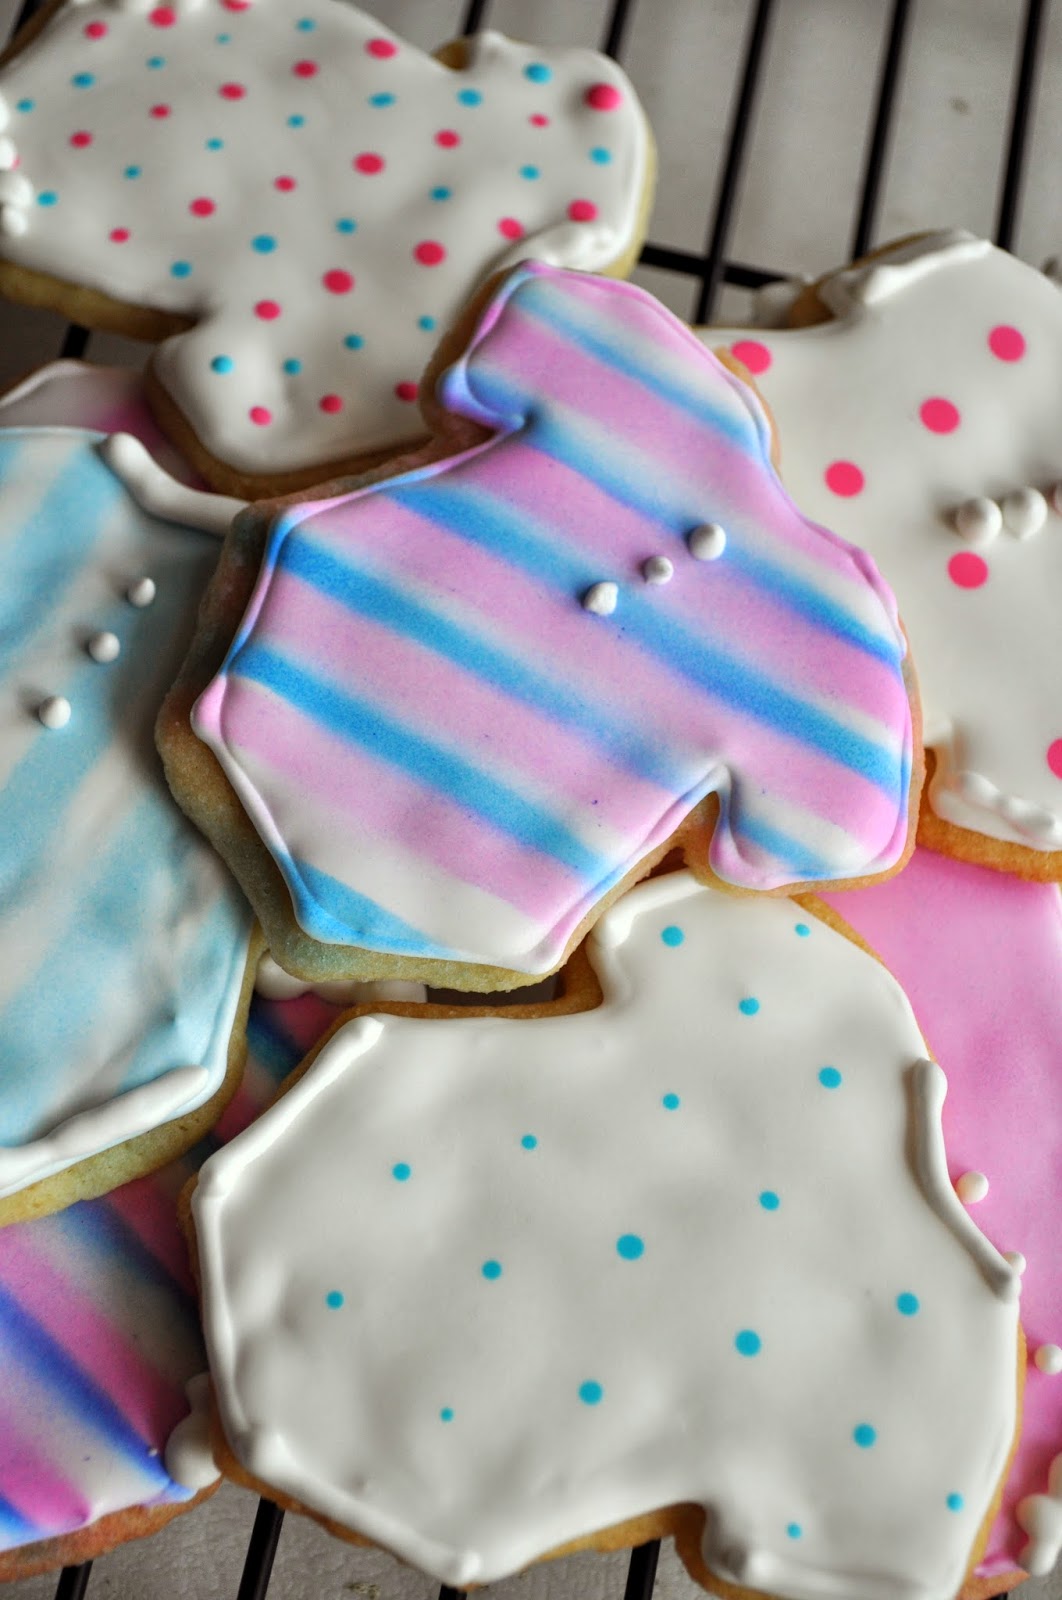
Onesie Baby Shower Cookie Favors
I had the honor of making these adorable favors for one of my dearest friends that I have known since elementary school. I used my usual sugar cookie recipe for cutout and royal icing as I did for these onesie cookies, but tried something new for decorating these. Hope you enjoy these new onesie cookies using homemade templates and food color spray. I loved how they came out and had such fun making them!
Wednesday, May 1, 2013
Mini Snickerdoodle Sandwiches
1½ cups sugar
1 teaspoon vanilla extract
2 eggs
2¾ cups flour
2 teaspoons cream of tartar
1 teaspoon baking soda
¼ teaspoon salt
3 tablespoons sugar
1 tablespoon cinnamon
1 quart ice cream, vanilla or caramel
lollipop sticks
1. Beat softened butter and sugar on medium speed until fluffy.
2. Add in eggs, one at a time, beating after each one.
3. Add in vanilla and beat for a moment to incorporate.
4. Mix flour, cream of tartar, salt, and baking soda in a separate bowl. Slowly add the dry flour mixture to your batter continually beating.
5. Combine cinnamon and sugar in small bowl or cup.
6. Pinch very small dime sized balls of dough and roll in cinnamon sugar mixture until fully covered.
7. Place on a parchment lined baking sheet and bake for about 5 minutes on 350 degrees.
8. Let cookies completely cool on drying racks. Take out the ice cream to soften while cookie cool.
9. Then take softened ice cream and spread onto one cookie and press second cookie on top of ice cream. Or if you'd like to have cookie sandwiches on a stick, insert a lollipop stick into the ice cream before placing the second cookie. You will want to keep these in the freezer until time to eat!
Source: Lovin' From the Oven
Labels:
Baked Good,
Cookies,
Dessert,
Edible Favors,
What's Baking
Tuesday, November 8, 2011
Lady Bug Sugar Cookies
with some pink girly flare!
Yes, these are pink lady bug cookies, because almost everything is better in pink, is it not? But more importantly, these cookies were made for a special one year old on her birthday! I made these lovely lady bugs for my best friend's adorable little girl. We had the pleasure to visit my wonderful friend and her sweet little girl for the weekend and we had a blast! She is truly the cutest thing since cupcakes and sprinkles!
These cookies are made of lemony vanilla dough and topped with royal icing. The recipe for these cookies has similar flavorings to an earlier sugar cookie I've made on here, but is a very different. As any of you who follow my posts know, I am always on the hunt to perfect my sugar cookies recipe, which means getting the joy to try many other recipes! Whether it's a cookbook, a magazine, a blog, a friend or family's recipe, or whatever, I'll gladly give a new recipe a whirl! And my husband and family don't mind serving the taste testing committee! This particular recipe is one I've heard much positive rumblings about in the cyber world. It's courtesy of the blog, Bake at 350, which posts all things cute, sweet, and colorful! The writer is both witty and incredibly talented with a piping bag! I used her basic sugar cookie recipe, only switching out some flavorings.
Lemon Vanilla Cookies
3 cups unbleached all purpose flour
2 tsp baking powder
1 cup sugar
2 sticks (salted) butter, cold
1 egg
1 tsp vanilla extract
3/4 tsp lemon extract
1/2 tsp lemon zest
1. Start by combining the flour and baking powder in a bowl; set aside.
2. Cream butter and sugar in the bowl of a stand or electric mixer.
3. Add in egg, extracts, and zest beating after each addition.
4. Slowly add in the dry mixture, beating and scraping the bowl down frequently.
5. Be sure to give the dough a quick hand knead before rolling it out.
6. Roll out your dough and grab your favorite round cookie cutter. Transfer the cut cookies onto parchment lined baking sheets.
7. Pop the baking sheet with cookies in the freezer for just a few minutes before placing them into a 350 degree preheated oven. Bake for approximately 10-12 minutes and then allow the cookies to rest on the baking sheets for a few minutes before moving them to cooling racks.
8. Once the cookies are fully cooled, decorate the cookies with your favorite colors for lady bugs following this recipe for royal icing from a previous post on house cookies.
For these cookies, I learned how to make polka dots on flooded icing! (Polka dots are one of my favorite things !) A full post on the how-to for this fun technique will be coming soon!
Source: Bake at 350
Also featured on: Made from Scratch Tuesday
Labels:
Baked Good,
Cookies,
Dessert,
Edible Favors,
Royal Icing,
Sugar Cookies
Saturday, August 27, 2011
Blueberry White Chocolate Cookies
When will this craziness end? The weather has been a constantly changing threat in the area all week long. First, we begun with an earthquake (luckily with no damage). It was so foreign to NJ and NY. And now we are preparing for hurricane with some possible negative ramifications. The food stores were like a madhouse today full of scurrying customers in search of water, batteries, flashlights, generators, and food. After some likewise shopping of my own and some fun craft purchases to keep me busy during the looming possibility of a long power outage, I knew we would be in for some fun! Well, as soon as I heard we could stuck without power (translate to not being able to cook/bake), hubby and I started baking! We whipped a few batches of brownies and muffins for the family to enjoy, as well as these yummy cookies chock full of fresh, summer blueberries! These are slight adaption of white chocolate raspberry cookies made earlier this summer. They were such a huge hit with everyone, we gave them a "re-mix" with blueberries. Summer certainly has been unpredictable this year!
Jade, from The Mess Pot, hosted the What's Baking Challenge this month, and her choice was to Celebrate Summer with a nice, fresh summer recipe. So since I had some local blueberries, I simply incorporated them into part of this yummy cookie recipe.
8 oz butter (2 sticks), softened
1 cup sugar
1/2 can sweetened condensed milk (7 oz)
2 cups self-rising flour
7 oz white chocolate chips or chopped pieces
1 pint blueberries
1. Cream the butter and sugar on medium speed until well blended.
2. Add the sweetened condensed milk and continue to mix.
3. Sift in the flour slowly, while mixing it into the dough with your hands.
4. Stir in the white chocolate.
5. Take small pieces of dough and flatten it into a disk with your fingers.
6. Place a few blueberries into the middle and fold up and over.
7. Bake on parchment lined baking sheets in a 350 degree oven for about 12-15 minutes. Rotate baking sheets halfway through bake time.
8. Allow cookies to set on the baking sheet for 2-3 minutes while cooling, then transfer to wire racks to fully cool.
Source: Phil Vickery from Womenseverything.com
Also featured on: Full Plate Thursday, Foodie Friday
Labels:
Baked Good,
Chocolate,
Cookies,
Dessert,
Fruit
Wednesday, July 20, 2011
Guest Post- Cappuccino Chocolate Chip Muffin (My Tasty Journey)
Good morning all! I'm excited to feature my first ever, guest blog post by the lovely and talented Donna, from My Tasty Journey. Donna is a yoga obssessive fellow Jersey girl and an avid foodie and travel-crazy blogger. She very generously volunteered to make quite a few dozen of these yummy cappuccino chocolate chip muffins for the Great American bake sale I hosted back in May. And they were one of the hits of the day! Hope you enjoy her and her scrumptious baked goods.
Hi everyone! My name is Donna and I blog over at My Tasty Journey.com. Amanda had asked me to share a recipe I had made for her Share our Strength bake sale a couple months ago. I ADORE this recipe for bake sales because you can double/triple the recipe EASILY, PLUS it has enough flavors to not need any frosting. No frosting = No mess = Travels well! Not to mention, they really couldn't be simpler!
First, you gather up the usual suspects:

Cappuccino Chocolate Chip Muffins
~1 package (18 1/4 oz.) vanilla cake mix
~1 package (3.4 oz.) vanilla pudding mix
~2 teaspoons instant espresso
~1/4 cup boiling water
~1 cup milk
~1/2 cup canola oil
~4 eggs
~2 cups mini chocolate chips
1.- Combine the espresso & boiling water and stir until nearly dissolved. (It doesn't have to dissolve completely. I've never had a problem with coffee grinds in my cupcakes) Allow to cool slightly.

2.- Next, combine the cake mix, pudding powder, eggs, milk and oil in a mixer and blend on medium speed until combined.

3.- Once everything is combined, turn your mixer to low and slowly pour in the slightly cooled coffee mixture.

4.-Beat for 3 minutes until all of the ingredients have blended completely.

5.- Fold in the food of the gods. I mean, the chocolate chips!

...and try not to sneak too many bites of the batter. This bowl smells HEAVENLY, I promise!

6.- Pour about 1/4 cup of batter into lined cupcake trays. (not too much, these babies GROW!)

7.- Bake in a preheated 375 degree oven for 18-20 minutes or until the "toothpick test" proves they are done!

And WALLAH! Done! Each recipes yields about 2 1/2 dozen, so it's pretty simple to make a HUGE batch in a short amount of time. Try these out if you love coffee & quick recipes
--
Donna
www.mytastyjourney.com
Please feel free to stop over and visit Donna at her blog. She features everything from workout information and healthy eats, to sweet snacks and travel finds, both local and abroad. Her warm amicable spirit flows through her writing and her food leaves you happy and healthy!
Also featured on: Tasty Tuesday, Tempt My Tummy Tuesday, Made From Scratch Tuesday, Works for Me Wednesday, What's Cooking Wednesday
Hi everyone! My name is Donna and I blog over at My Tasty Journey.com. Amanda had asked me to share a recipe I had made for her Share our Strength bake sale a couple months ago. I ADORE this recipe for bake sales because you can double/triple the recipe EASILY, PLUS it has enough flavors to not need any frosting. No frosting = No mess = Travels well! Not to mention, they really couldn't be simpler!
First, you gather up the usual suspects:

Cappuccino Chocolate Chip Muffins
~1 package (18 1/4 oz.) vanilla cake mix
~1 package (3.4 oz.) vanilla pudding mix
~2 teaspoons instant espresso
~1/4 cup boiling water
~1 cup milk
~1/2 cup canola oil
~4 eggs
~2 cups mini chocolate chips
1.- Combine the espresso & boiling water and stir until nearly dissolved. (It doesn't have to dissolve completely. I've never had a problem with coffee grinds in my cupcakes) Allow to cool slightly.

2.- Next, combine the cake mix, pudding powder, eggs, milk and oil in a mixer and blend on medium speed until combined.

3.- Once everything is combined, turn your mixer to low and slowly pour in the slightly cooled coffee mixture.

4.-Beat for 3 minutes until all of the ingredients have blended completely.

5.- Fold in the food of the gods. I mean, the chocolate chips!

...and try not to sneak too many bites of the batter. This bowl smells HEAVENLY, I promise!

6.- Pour about 1/4 cup of batter into lined cupcake trays. (not too much, these babies GROW!)

7.- Bake in a preheated 375 degree oven for 18-20 minutes or until the "toothpick test" proves they are done!

And WALLAH! Done! Each recipes yields about 2 1/2 dozen, so it's pretty simple to make a HUGE batch in a short amount of time. Try these out if you love coffee & quick recipes
--
Donna
www.mytastyjourney.com
Please feel free to stop over and visit Donna at her blog. She features everything from workout information and healthy eats, to sweet snacks and travel finds, both local and abroad. Her warm amicable spirit flows through her writing and her food leaves you happy and healthy!
Also featured on: Tasty Tuesday, Tempt My Tummy Tuesday, Made From Scratch Tuesday, Works for Me Wednesday, What's Cooking Wednesday
Subscribe to:
Posts (Atom)
.jpg)