Showing posts with label Chocolate Ganache. Show all posts

Thursday, August 29, 2013

Italian Butter Cookies


As long as I can remember I have had a love for these cookies. It's truly closer to an obsession. Like I could eat a lot of them. Especially the chocolate dipped shells and the sandwich ones! When I was little, my Dad took me to this adorable bakery every Sunday after church and let me get four cookies of my choosing. And every week I got some variation of these cookies! It was my special father-daughter date time with Daddy. We would drive home from church while I munched on the cookies and I would just yap on and on about life while my dad just listened. It's still one of my all time favorite memories. The bakery closed many years ago and last month it was knocked down. But even now when I drive by all I think about is driving home from church with my Dad and my cookies.

So after years of searching and trying out recipes, I found a fantastic recipe which is as close as possible to the cookies from this bakery. They are simple butter cookies that start with an almond paste base. You can find them at almost any bakery in NJ or NY, but I have never mastered them myself until recently. And I have the approval of one of my best friends, who is also addicted to these cookies, and  from everyone at the bridal shower of a close friend, so they were a total hit!


The real difference I learned with other recipes and attempts was whether to use butter or shortening. It ends up the recipe I found uses both, butter and shortening, as well as almond paste to make a great mixture of flavor and texture. This cookie is both crumbly but not too dry and just melts in your mouth. Hope you love these as much as I do!


For this month's What's Baking challenge, Nicole, from Seven ate Nine, choose Italian theme and I was thrilled! Being fully Italian and growing up cooking, eating, and loving all things Italian, this is my favorite challenge yet. So I am here to share the best Italian butter cookie recipe I have found! Mangia!


1 stick butter, softened
1/2 cup shortening
1 cup plus 2 tbsp confectioners' sugar (sifted)
4 egg whites
3 oz almond paste
pinch of salt
1 tsp almond extract
2 tsp vanilla extract
3 1/4 cup flour
1/4 tsp baking powder
1/4 cup cocoa powder (optional)

Optional toppings and decorations:
1 cup bittersweet chocolate, chopped and 1/3 cup heavy cream (for making ganache)
sprinkles
maraschino cherries, drained and cut in half
jams

1. In a mixer with paddle attachment, beat just the almond paste on medium high until it becomes soft. (Wish I had the homemade kind, but I just used the canned one) Then add the butter and shortening and continue to cream them all together. *It is important that the butter is room temp

2. Add in the confectioners' sugar while mixing on medium to incorporate. Scrape down the sides of the bowl.

3. Continue by adding in egg whites and extracts slowly and keep mixing on medium. Scrape down sides of the bowl.


4.  Sift in the dry ingredients (flour, baking powder, and salt) together in the mixer until blended in and stop. If you would like all or part of your dough to be chocolate, add in cocoa powder. I made half of mine chocolate and kept half vanilla.


5. Fit pastry bag with a large star tip and fill with dough. Line baking sheets with parchment paper.
Begin to pipe star, shells,  or fingers. Try to keep your baking sheets with similar shapes to not alter cooking time, because the thicker and bigger cookies will of course bake slightly longer.
*If making star/rosette shapes cookies, you can add a maraschino cherry to the center of each cookie or cover with sprinkles.


6. Bake cookies in 350 degree oven for 12-15 minutes. Remove from sheets and let completely cool on drying racks.

7. Now onto decorating, the fun part! For the star/rosette cookies they were decorated before baking with sprinkles or a cherry. The fingers are traditionally done with either jam or chocolate ganache filling, but feel free to experiment with your own ideas. I used a raspberry preserve in a ziploc bag with a small cut on the tip to fill the vanilla fingers. Just squeeze the jam in the middle of the flat side of the cookie and then place another flat side down on top to make a sandwich. For the chocolate fingers, I used chocolate ganache. It is made my simply heating whipping cream in microwave for approx. 2-3 minutes until hot then pouring over chopped chocolate. Allow it to sit for 4 minutes then stir until smooth and thick. Using a spoon, I spread the ganache in the middle of the finger cookie and top some of the vanilla finger cookies. The shells are simply dipped in the remaining ganache and then sprinkled. Allow all the cookies with ganache to set fully.


My favorites were the vanilla shells with ganache and sprinkles, vanilla fingers with raspberry jam, chocolate fingers
with chocolate ganache, and chocolate rosettes with maraschino cherries. Enjoy! What are your favorite kinds! If you make a variation of this recipe or try new shapes and toppings, please share them! I love to see new inventions of old favorites. My next project, might be cream cheese (cheesecake like) filling.


Source: Woodland Bakery in Chatham, NJ's website

Monday, February 25, 2013

Cake Mix from Scratch (Vanilla and Chocolate)


So I have some time to make up for here. It's been quite some time since I've had time to blog. Mind you not that I haven't been in my kitchen. Since we moved into our house, I have no doubt spent more time here than anywhere and I love my kitchen! I've missed blogging and sharing all the yummy foods that get made in this kitchen. And I will be filling in new post with recipes I have made and been storing up for blogging!

I have a love/hate relationship with easy baking items, like pre-made cookie dough or boxed cake mix. The lazy side of me LOVES it because I can whip it out quickly and still add some extra touches or twists to make them my style. However, most of me, argues that I prefer homemade always and will usually go through painstaking and strange routes to find just the right size piping tip or a strange, hard to find ingredient to make something myself. And I do always enjoying knowing that I made it and that I know the quality and freshness of what goes in my food. So I found where the two meet. My own prepared cake mix. My own ingredients packaged for when I want them. And for this month's What's Baking challenge Stephanie, from Brownies and Blondies, challenged us to make a homemade convenience item for baking and this is mine.


For our 4th wedding anniversary, I made a quick attempt to make a mini version of our wedding cake. Luckily, I had made some of these dry cake mixes because the week before our anniversary, my hubby and I both came down with something and were not feeling well at all so I didn't have as much time I wanted to bake.  Our wedding cake was chocolate and vanilla layers with a cheesecake layer in the middle covered in chocolate ganache. I used my chocolate ganache recipe from the giant peanut butter cookie to pour over the cake and a new cheesecake recipe (which I will post later) that was more dense and sturdy for the middle.

Vanilla Dry Cake Mix

2 cups all purpose flour
1 1/2 cup sugar
1 tbsp baking powder
1/2 cup nonfat dry milk


Chocolate Dry Cake Mix

3 cups all purpose flour
2 cups sugar
8 tbsp cocoa
2 tsp baking soda
2 tsp salt


For both mixes, simply combine all the ingredients for each mix and then store in an air tight container such as a ziploc bag or mason jar. Then label with date and instructions for a later time. The mixes can be stored for months in your pantry and will make 2 - 8" inch cakes or 24 cupcakes, similar to a boxed cake mix.


Vanilla Cake:
In a large mixing bowl, take your cake mix and add in 3/4 cup water, 2 tsp vanilla, 1/2 cup softened butter, and 3 eggs. Combine well and bake on 350 degrees until toothpick comes out clean. For 8" cakes 20-25 mins and for cupcakes 12-15 mins.


Chocolate Cake:
In a large mixing bowl, take your cake mix and add in 2 cups cold water, 2 tsp vanilla, 2 tbsp vinegar, and 3/4 cup of oil. Combine well and bake on 375 degrees for 20-25 mins for 8" cakes or 11-13 mins for cupcakes.


Sources: Adapted from Chickens in the Road and A Thrifty Mom

Saturday, December 31, 2011

Mini Brownies


Belated Merry Christmas and a Happy New Year's Eve to everyone! We are in a our new home!!! And we somehow managed to host a 20 person Christmas dinner made up of 5 courses with help of our awesome family!! We owe a lot to all the members of my family who dedicated countless hours to do everything from cook, clean, and unpack to lay flooring and painting. We still haven't fully unpacked and despite the fact that the kitchen floors are still not grouted, it was a perfect Christmas in our new home! However, our house and the internet have yet to be friends so this is my first post in the month of December as ironically the month and year come to a close! Pictures, stories, and of course, more recipes to come in 2012! Wishing many blessings to all of you in this new year!


Since December is National Brownie Month, Nicole, from Seven Ate Nine , chose a brownie challenge for this month's What's Baking. I used the brownie recipe from Baker's chocolate topped with a simple ganache for icing. It was a perfect bite-sized treat!


4 squares unsweetened Chocolate
3/4 cup butter or margarine
2 cups sugar
3 eggs
1 tsp vanilla
1 cup flour
1 cup coarsely chopped pecans
1 cup heavy cream
1 cup chocolate chips or chunks


1. Melt the chocolate squares and butter in medium sized bowl in the microwave for about two minutes or until melted. Stir until thoroughly mixed together. Set aside to cool slightly.

2. Transfer chocolate mixture to a mixing bowl and add in sugar. Beat to incorporate.

3. Add in eggs and vanilla on low. Mix in flour and nuts until well blended. We skipped nuts for those who may be allergic, but it would be good. You could replace nuts with white chocolate or semisweet chunks too.

4. Using a small cookie scoop and a well VERY greased mini muffin pan, scoop small amounts into each cup. Put into a preheated oven of 325 degrees and bake for 12-14 minutes. Do not overbake. Flip them onto baking racks to cool. Make sure you grease those cups well or they will get stuck!

5. While the mini brownies cool, heat one cup of heavy cream on stove top or in a microwave until it reaches a boil, then remove. Pour atop chocolate chunks or chips. I opted for milk chocolate, but any kind will do! Let the hot cream soften the chocolate and then stir.

6. Dip mini brownies into the ganache for a yummy topping or eat them naked if you prefer. I also topped them off with dark chocolate chunks, festive sprinkles, and cinnamon chips. Use whatever you have in the pantry! Enjoy! HAPPY NEW YEAR!


Source: Baker's Unsweetened Chocolate Box or Kraft Recipes

Tuesday, June 28, 2011

Red, White, and Blue Mini Layer Cakes for Two


This month's What's Baking challenge, from Heather of Hezzi-D's Books and Cooks, was to bake a layer cake. And I love layer cakes! You get more icing and filling than other cakes! Why not have layers? The logic seems to work, at least for me.


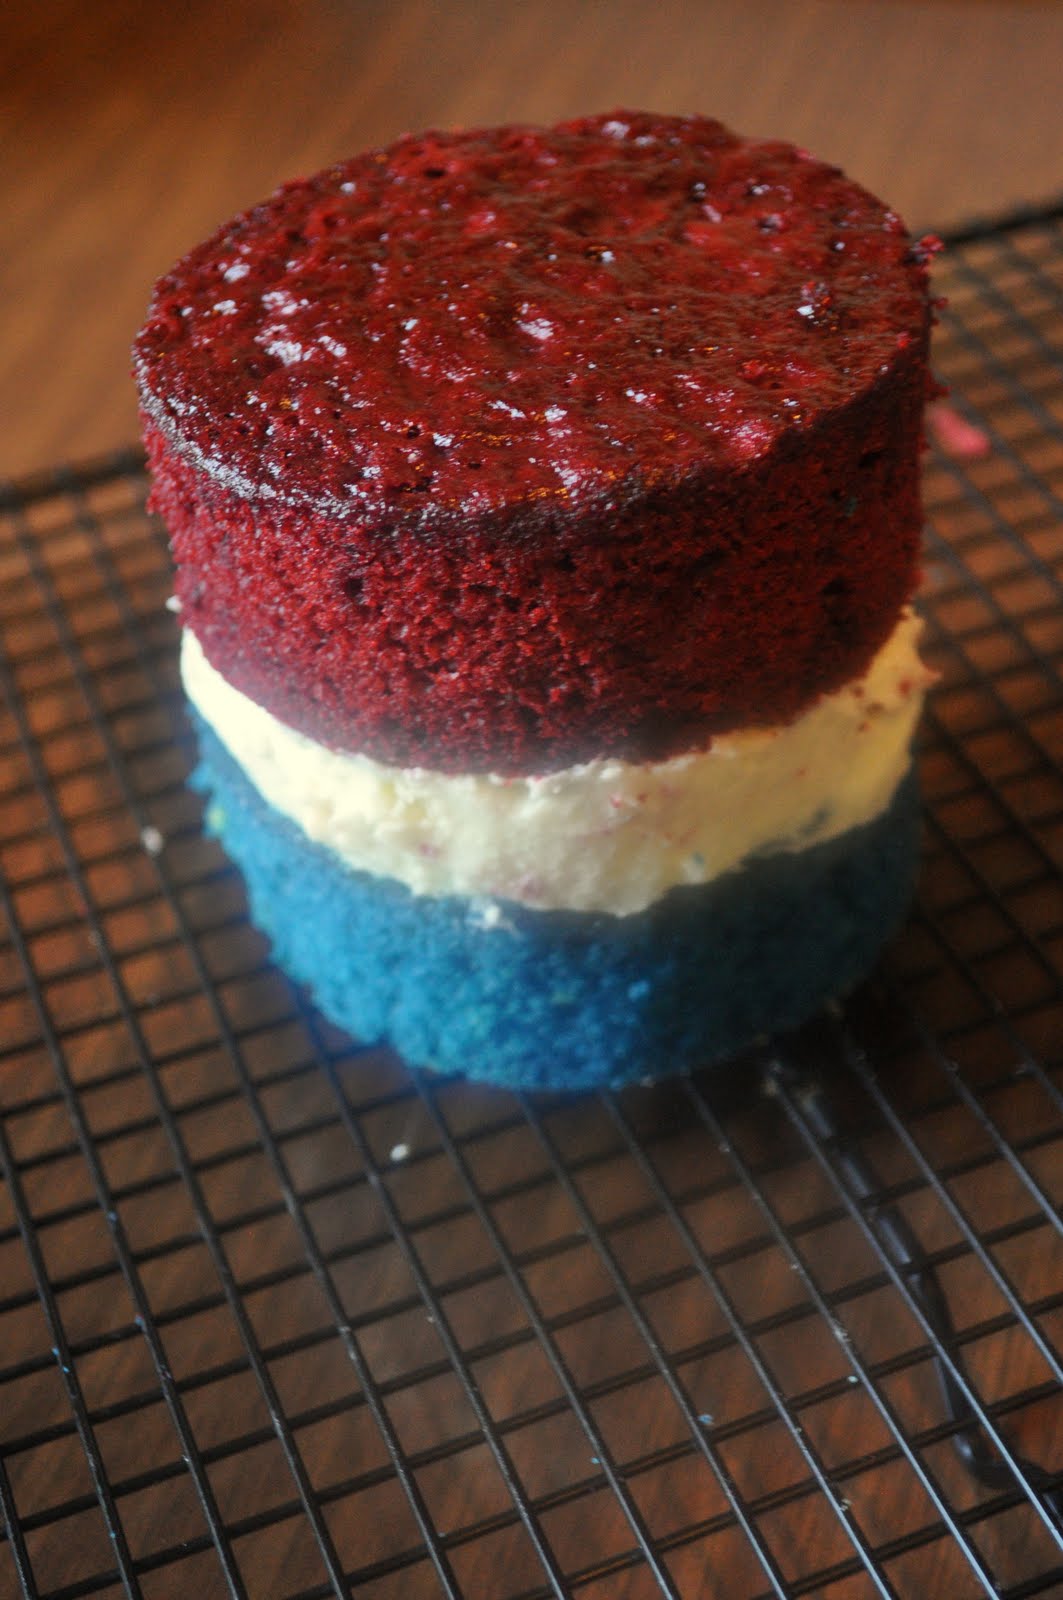
Since the 4th of July is coming up just around the bend, I decided to make my layer cake patriotic with red, white, and blue components. Red was simple, because I love red velvet, blue was just a spin-off of red velvet now called blue velvet, and since hubby had just taken a trip to Junior's recently and brought me some cheesecake, I had cheesecake on the brain. The assembly resembles our wedding cake as well! Our wedding cake was chocolate and vanilla layers with actual NY cheesecake in the middle covered with chocolate ganache. Well, this is similar, red and blue velvet cake with cheesecake piped in the middle covered with white chocolate ganache. And if you are thinking to yourself, "Which was better?", all I can say is... I'm not going to argue with either one!


Cheesecake:
1 1/2 lbs cream cheese
1 1/3 cups sugar
5 large eggs
16 ounces sour cream
1/4 cup flour
2 teaspoons vanilla extract
1 teaspoons lemon juice

Cake: (Red Velvet/Blue Velvet)

2 1/2 cup cake flour
1 1/2 cup sugar
1 tsp baking soda
1 tbsp cocoa powder
1 tsp salt
2 eggs, room temp
1 1/2 cup oil
1 cup buttermilk
1 tbsp gel food color, approx.
1 1/2 tsp vanilla
1 tsp white distilled vinegar

White Chocolate Ganache:
8 oz white chocolate
2/3 cup heavy cream

*Makes 3-4 mini layer cakes*


1. Let's start with making our cheesecake, since it has to cook and cool the longest. You may recognize this cheesecake recipe from an earlier post here. It's the same minus the crust.

2. Start by creaming the softened cream cheese. Then add the sugar and eggs, one at time, while continuing to beat on low.

3. Add flour, lemon juice, and vanilla. Stir. Fold in the sour cream.

4. Pour batter in a 9" springform pan and bake on 325 degrees for about an hour and fifteen minutes. No need to be worried about cracking or appearance for this cheesecake seeing as it be piped later. Once cooled, place in fridge until time to assemble cake.

5. Now, let's work on our cakes. We are going to make red and blue velvet cakes in 9" cake pans. To do so, we are going to simply divide the batter and add red food coloring to one half and blue food coloring to the other half. If you wanted to make a few more mini cakes, you could double the recipe and dye each batch, red and blue respectively. This recipe is from an earlier post of red velvet stuffed cupcakes.

6. In a medium bowl, sift together all of the dry ingredients for the cupcakes: flour, sugar, baking soda, cocoa, and salt. Set aside.

7. In the bowl of a stand mixer add all the wet ingredients: eggs, oil, buttermilk, food coloring, vanilla, and vinegar. Beat until smooth.

8. Slowly add the dry mix into the wet mix and blend for a minute or two until fully incorporated. Pour batter into two greased and floured cake pans.

9. Bake at 350 for 28-33 or until fully done. Test with toothpick. Set aside to cool.

10. Once both the cheesecake and cakes are fully cooled, you can begin to make the white chocolate ganache. Place the white chocolate, slightly broken up, into a double boiler over low heat.

11. Stir and let chocolate melt slowly. Add in the heavy cream and continue to stir over low heat. Once fully melted, continue to stir for about 2 minutes, then remove from heat and allow to cool for about 15 minutes, stirring occasionally while cooling.

12. Time to assemble! Start by using a cookie cutter or I used a biscuit cutter to make 3 " circles. Depending on the exact shape of the pan and cutter, you will yield either three or four of each color. Place the blue circles on a baking rack. Blue cakes will be bottoms and red cakes will be tops, but you can feel free to switch 'em up!

13. Scoop cheesecake into a piping bag fit with a coupler and large round tip. Begin piping on top of each blue cake circle to fill the surface. Continue with all bottoms. Place red circles on top of the cheesecake filling to finish the cake tower.


14. By now, the ganache should be fully cooled. Be sure to place a dish or cookie sheet under the baking rack to catch the drips. Start spooning white chocolate ganache over the cakes and let it drip down the sides.


15. Depending on the thickness you desire, you may want one or two coats of ganache. I did two on mine. After the first coat, pop them in the fridge for 10 minutes and then apply second coat!
That's it! Now you have a perfect patriotic dessert for the 4th of July! Enjoy!


Also featured on: Savory Sunday, Mangia Monday,Moutherwatering Monday, Made from Scratch Tuesday, Tempt my Tummy Tuesday, This Chick Cooks

Thursday, April 7, 2011

Giant Peanut Butter Chocolate Chip Cookie


Welcome to the Autism Awareness section of my blog post for the month of April in honor of my brother! I'm sure most people have heard of autism, but how many people really know what it is? Autism is a pervasive developmental disorder that affects people in every walk of life. It is classified by particular behaviors and difficulty in communications. Not every person with autism presents the same characteristics. People are categorized "on the spectrum" based on levels of functioning. But what's so surprising is how very many people are being diagnosed with autism, asperger's or other disorders on the PDD spectrum. According to a study done two years ago, one child in every 110 children is born with autism. Even more so affrected are boys with a 1 to 70 ratio. Where we live has one of the highest rates of autism in the country; 1 in 94 children born are affected. Those results are staggering when compared with other developmental delays. These reasons, plus many more are simply the beginning of why it's crucial to spread awareness. The more we know, the more we can accomplish.


Now back to our regularly scheduled program... I've been trying to think of a way to share Autism Awareness in my food this month and have come up with some good ideas and some not so good ideas. This simple recipe is merely a fun way to spread awareness with baked goods which feature the colors and symbols of Autism Awareness. Some people call this concoction a cookie pizza and others call it a cookie cake. I'm leaning toward pizza, but either sounds good, because it'll be gone so fast!


Peanut Butter Chocolate Chip Cookie "Cake/Pizza"
This cookie cake is simply a double batch of the peanut butter cookies I previously made here, but I will share the revised recipe.

1 stick butter (softened)
1/2 cup peanut butter ( I used smooth, but chunky would be great too)
1/2 cup granulated sugar
1/2 cup dark brown sugar 1 egg
1 1/4 cup all purpose flour
1/2 tsp baking powder
1/2 tsp baking soda
1/4 tsp salt
1 1/2 cup mini chocolate chips (I used min kisses!)

Chocolate Ganache (for topping)
1 cup of heavy cream
1 1/2 cup chopped chocolate


Giant Cookie

1. Preheat oven to 375 degrees.

2. Cream butter, peanut butter, sugar, and brown sugar in a mixing bowl.

3. Add the egg and continue to beat until fluffy.

4. In a separate bowl, combine flour, baking soda, baking powder, and salt.

5. Slowly add dry mix to peanut butter mix while beating.

6. Stir in chocolate chips.

7. Cover a 16" pizza pan with foil or parchment and spread cookie dough with a lightly greased spatula. I even gave the foil a quick spray before filling the pan just to be sure there had no surprises later...

8. Bake on 350 for 18-23 minutes, until fully cooked through. Remove from oven and let cool.


Ganache

1. Take your chocolate bar and break it up into smaller pieces for easier melting. Spread out the pieces in a large bowl. You can use whatever chocolate you have on hand, but the better the chocolate, the better the results. I used a large milk chocolate bar I had hanging around Valentine's Day.

2. Heat the cream on medium-low. Watch it carefully. It will simmer for a few minutes and then as soon as it reaches a boil, immediately remove it from the heat and pour over the chocolate.

3. Stir the chocolate and cream together until smooth and fully incorporated.

4. Pour the ganache over the cookie and help spread it out to the edges with a spoon or spatula.

5. Then decorate as you desire. You can use candy, marshmallows, other types of melted chocolate or peanut butter, icing, nuts, or whatever toppings you want. I used mini M&Ms in the colors of the autism awareness ribbon. Then just cut a slice and eat!


For more information about Autism, please visit these sites:
Autism Society of America
Autism Speaks
Easter Seals


Remember to Support. Educate. Advocate. for Autism Awareness now and all through the year!
Source: Peanut Butter Chocolate Chip Cookies, previously blogged by me, originally from Stephanie Cooks

Also featured on: Full Plate Thurdays

Tuesday, June 8, 2010

Banoffi Trifle


Banoffi Trifle (from BBC Good Food)
Please enjoy this trifle recipe. It's very simple and delicious. It's prefect for a summery treat.

8 tbsp tropical fruit juices (ended up using coconut water and that was fine too)
3 tbsp of rum
3 firm bananas
2 pound cake loaves (sliced thinly)
5 tbsp of Belgian chocolate sauce (or I think Nutella or chocolate ganache-see recipe at bottom of post- could work well)
6 tbsp of dulce de leche
1 lb of mascarpone
1 pint of heavy whipping cream
7 tbsp of conf sugar
dark chocolate bar


1. Mix fruit juices, rum, and sliced bananas in a bowl.

2. Spread the chocolate sauce on the pound cake and top with another slice to make little chocolately sandwiches.

3. Cut these sandwiches into cubes(if making individual trifles) or in strips (for a larger trifle). Layer on the bottom of your desired container.

4. Top with the banana mixture.

5. Drizzle dulce de leche over bananas.

6. Add the heavy whipping cream and sugar to your mixer. Mix on high for about 3-5 minutes (until firm peaks form).

7. Add in the mascarpone and fold in using a rubber spatula.(Don't over mix or the texture will turn grainy). The mascarpone will help the fresh cream keep its form and last longer.

8. Top with mascarpone cream and shred dark chocolate curls for garnish. Be sure to keep covered in refrigerator until serving.


Simple Chocolate Ganache Recipe (for inside the sandwiches)

6 oz of dark chocolate
1 pint of heavy cream

1. Roughly chop dark chocolate and place in a shallow bowl.

2. Heat heavy cream on low heat until it boils. Let simmer one minute and remove from heat.

3. Pour hot heavy cream on top of dark chocolate. Do no stir or mix, just let rest for 5 minutes.

4. After resting you may now gently fold with a spatula to incorporate chocolate and cream to make a very delicious chocolate sauce.